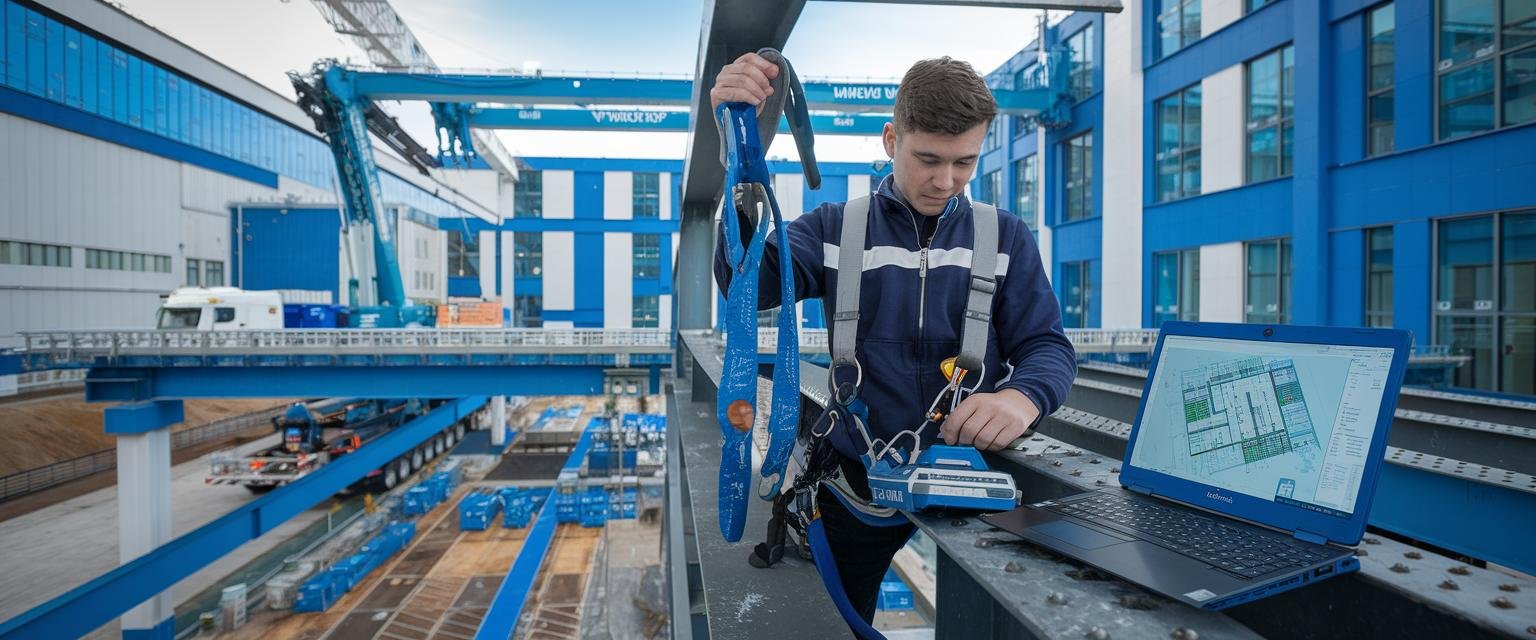
I remember my first day at a construction site as a fresh graduate. The project manager handed me a thick folder of plans and said, “Make sure we stay on track.” No guidance, no templates, just sink or swim. That day taught me the hard truth about project planning in civil engineering – without a solid framework, even the most brilliant designs can fail spectacularly.
Project planning in civil engineering isn’t just about creating fancy charts or impressive presentations. It’s the backbone that supports every successful infrastructure project, from small residential developments to massive highway systems. Whether you’re a recent graduate or a seasoned professional looking to refine your approach, mastering these essential planning steps will set you apart in the industry.
In this guide, I’ll walk you through the seven critical steps that have consistently delivered results in my experience working across multiple engineering projects. These aren’t theoretical concepts from textbooks – they’re practical strategies I’ve refined through both successes and failures in the field.
The Quick Takeaway: Civil Engineering Project Planning in a Nutshell
Short on time? Here’s what you need to know about effective project planning in civil engineering:
- Planning isn’t just paperwork—it’s your blueprint for success that prevents costly mistakes
- The 7 essential steps: scope definition, budgeting, scheduling, risk management, quality control, communication, and monitoring
- Real success comes from adapting these principles to your specific project needs
- Digital tools like BIM can cut project times by 30% when implemented properly
- Your communication skills often matter more than your technical expertise
Want the full details? Keep reading for my battle-tested strategies and real-world examples.
What is Civil Engineering Project Planning and Why Does It Matter?
Defining Project Planning in Civil Engineering
In my experience, project planning in civil engineering boils down to answering some critical questions: What are we building? How will we build it? When will we finish each part? And who’s doing what? It’s about creating a roadmap that keeps everyone on the same page.
Unlike planning for a software product or marketing campaign, civil engineering planning deals with physical constraints, natural environments, and public safety considerations that simply can’t be compromised.
The answers to these questions form the roadmap that guides every decision throughout the project lifecycle.
Key Benefits of Thorough Planning in Civil Engineering
I’ve seen projects both succeed brilliantly and fail miserably, and the difference almost always comes down to planning quality. Here’s why planning matters:
- Cost Control: Proper planning helps identify and manage expenses before they spiral out of control. On a bridge project I worked on, preliminary planning identified potential foundation issues that, if discovered during construction, would have increased costs by 22%.
- Risk Reduction: Identifying potential problems early allows for proactive solutions rather than reactive fixes. I once saved a highway project three weeks of delays by planning for alternative material suppliers when our risk assessment flagged potential supply chain issues.
- Regulatory Compliance: Planning ensures all necessary permits and approvals are obtained on schedule. I’ve seen projects grind to a halt because someone forgot to factor in the 45-day review period for environmental permits.
- Stakeholder Satisfaction: Clear planning sets realistic expectations for clients, communities, and team members. When everyone knows what’s happening and when, you avoid the dreaded “I thought this would be done by now” conversations.
The Interdisciplinary Nature of Civil Engineering Planning
Civil engineering planning doesn’t happen in isolation. It requires collaboration across disciplines:
- Architects provide design vision
- Environmental scientists assess ecological impact
- Geotechnical engineers analyze soil conditions
- Structural engineers determine load requirements
- Mechanical and electrical engineers plan building systems
As the civil engineer, you often serve as the central coordinator of these diverse perspectives. During a commercial development project I led last year, I found myself translating between the architect’s aesthetic vision and the structural engineer’s practical concerns almost daily. Your ability to bridge these different perspectives can make or break a project.
Key Takeaway: Project planning in civil engineering is not just paperwork—it’s a strategic process that prevents costly mistakes, ensures regulatory compliance, and coordinates multiple disciplines toward a common goal. The time invested in planning pays dividends throughout the project lifecycle.
7 Steps to Flawless Project Execution
Step 1: Project Initiation and Scope Definition
The foundation of any successful civil engineering project is a crystal-clear scope definition. Without it, you’re essentially building on quicksand.
Start by documenting:
- Project objectives and deliverables
- Physical boundaries and limitations
- Quality standards and specifications
- Exclusions (what the project will NOT include)
During my work on a municipal water treatment facility, our initial scope failed to clearly define the boundaries between our work and the electrical contractor’s responsibilities. This oversight led to three weeks of delays and heated debates about who was responsible for power supply connections. We were both saying, “That’s not my job” while the client was saying, “I don’t care whose job it is, just get it done!”
The scope definition process should include:
- Interviewing key stakeholders to understand their expectations
- Reviewing similar projects for reference points
- Documenting assumptions and constraints
- Creating a formal scope statement that all parties approve
A well-defined scope serves as your project’s constitution—the document you return to whenever questions or disputes arise.
My Tip: Create a one-page scope summary with visual boundaries marked on a site plan. I’ve found this simple tool prevents most scope disputes because everyone has the same mental picture of what we’re building.
Key Takeaway: A detailed project scope is your best defense against scope creep and miscommunications. Take time to document not just what will be done, but also what won’t be included in the project. Get formal sign-off from all stakeholders before proceeding.
Step 2: Budgeting and Cost Estimation
Civil engineering projects can quickly derail financially without thorough budgeting. I’ve found that effective cost estimation requires a combination of methods:
Bottom-up Estimating: Break down each project component and estimate individual costs. This works well for standard elements like concrete volume or earthwork. When I’m planning a foundation, I’ll calculate exact quantities of concrete, rebar, formwork, labor hours, and equipment time needed.
Parametric Estimating: Use mathematical models based on known variables. For example, estimating bridge costs based on span length and type. I keep a spreadsheet that can quickly give me a rough cost for different structure types based on key parameters.
Analogous Estimating: Reference similar completed projects and adjust for differences. I keep a database of past projects specifically for this purpose. Last year, when pricing a new parking structure, I referred back to three similar projects we’d completed in the last five years, adjusting for inflation and site conditions.
A comprehensive budget should include:
- Direct costs (materials, labor, equipment)
- Indirect costs (permits, design fees, insurance)
- Contingency funds (typically 5-15% depending on project complexity)
- Escalation costs for multi-year projects
One technique that saved a highway project I worked on: creating three distinct estimates—optimistic, most likely, and pessimistic. This three-point estimation helped us identify where we needed more detailed information and where our assumptions might be weak.
Always remember to update your budget as the project progresses. Static budgets quickly become obsolete as conditions change.
Step 3: Scheduling and Resource Allocation
A realistic schedule is perhaps the most visible component of your project plan. Creating an effective schedule involves:
- Breaking the project into discrete work packages
- Determining dependencies between activities
- Estimating durations based on resource availability
- Identifying the critical path that determines project duration
I use a combination of tools for scheduling:
- Gantt charts for visual timelines
- Critical Path Method (CPM) to identify schedule drivers
- Resource histograms to prevent overallocation
For a residential development project I managed, we created a detailed resource-loaded schedule that showed exactly when we would need specific heavy equipment. This allowed us to negotiate better rates with equipment providers by guaranteeing longer rental periods with specific start and end dates. We saved almost $30,000 on excavator rentals alone by planning this way.
Common scheduling mistakes to avoid:
- Failing to account for weather conditions (I always build in rain days during spring seasons)
- Overlooking procurement lead times (especially critical now with ongoing supply chain issues)
- Scheduling too many activities in parallel without sufficient resources
- Not building in float time for critical activities
For effective resource allocation, I maintain a master resource calendar that shows the availability of key personnel, equipment, and materials across all projects. This prevents the common problem of accidentally double-booking critical resources.
Step 4: Risk Management and Mitigation
Every civil engineering project faces risks, but the successful ones have comprehensive strategies to address them.
When I manage risk on my projects, I start with a team brainstorming session. We grab a whiteboard and ask, “What could possibly go wrong?” Drawing from our past projects, we create a checklist of potential issues specific to this project.
The risk management process includes:
- Risk Identification: On a recent highway project, we identified 37 distinct risks ranging from groundwater issues to material delivery delays. I like to categorize risks by project phase to make sure we’re looking at the complete picture.
- Risk Analysis: I use a simple 1-5 scale for both probability and impact, then multiply them to get a risk score. Anything above 15 gets special attention. It’s not fancy, but it works.
- Risk Response Planning: Develop specific strategies for high-priority risks:
- Avoid: Change plans to eliminate the threat
- Mitigate: Reduce probability or impact
- Transfer: Shift risk to another party (insurance, contracts)
- Accept: Acknowledge and monitor low-priority risks
- Risk Monitoring: Continuously track identified risks and scan for new ones throughout the project lifecycle.
Common civil engineering risks I’ve encountered include:
- Geotechnical surprises (unexpected soil conditions)
- Weather events disrupting construction
- Material price fluctuations
- Regulatory compliance issues
- Public opposition or stakeholder conflicts
For each high-priority risk, assign an owner responsible for monitoring and implementing response strategies. I find that when someone’s name is attached to a risk, it actually gets managed rather than ignored.
Step 5: Quality Control and Assurance
Quality failures in civil engineering can have catastrophic consequences. A structured approach to quality management includes:
Quality Planning: Define quality standards and how they’ll be measured. For example, concrete compressive strength requirements, surface finish specifications, or alignment tolerances.
Quality Assurance: Proactive processes to prevent defects, including:
- Material testing and certification
- Contractor prequalification
- Training requirements for workers
- Regular quality audits
Quality Control: Verification activities to identify defects, such as:
- Inspection points at critical stages
- Testing procedures and frequencies
- Documentation requirements
- Non-conformance protocols
On a bridge rehabilitation project I supervised, we implemented a three-tier quality system with daily inspections by the contractor, weekly reviews by our field engineers, and monthly independent assessments. This layered approach caught several potential issues before they became expensive problems.
I remember one instance where our field engineer noticed slight discoloration in a concrete delivery. Testing confirmed the mix was out of specification, and we rejected the entire load before it was placed. That attention to quality saved us from having to demolish and replace a pier cap, which would have set the project back by weeks.
Document every quality check in a centralized system. Well-maintained quality records not only demonstrate compliance but provide valuable data for improving future projects.
Step 6: Communication and Collaboration
Poor communication derails more civil engineering projects than technical problems do. An effective communication plan addresses:
Who: Identify all stakeholders who need information:
- Project team members
- Client representatives
- Regulatory authorities
- Community members
- Subcontractors and suppliers
What: Define what information each stakeholder needs:
- Technical specifications
- Schedule updates
- Budget reports
- Risk alerts
- Quality issues
When: Establish communication frequency:
- Daily toolbox talks for field teams
- Weekly progress meetings with key team members
- Monthly client updates
- Quarterly public information sessions
How: Select appropriate communication methods:
- Face-to-face meetings for complex discussions
- Email for documentation
- Project management software for tracking
- Public websites for community information
I’ve found that creating a simple communication matrix that maps stakeholders to information needs and frequency dramatically improves project transparency. On my projects, everyone knows exactly what information they’ll receive and when they’ll receive it.
For a municipal project I managed, we established a dedicated public information center with regular updates, which turned potential opposition into community support by keeping everyone informed. We even created a simple website where residents could see weekly progress photos and upcoming construction activities that might affect their commutes.
Step 7: Monitoring, Control, and Project Closure
Even my most detailed plans need regular check-ups. On my last highway project, we set up weekly progress meetings where we compared our actual work against our plan. We used simple metrics like comparing percentage complete against percentage of budget spent to quickly spot potential issues.
Effective project control includes:
Performance Tracking: Measure actual progress against the plan using:
- Earned Value Management (EVM) metrics
- Schedule performance index (SPI)
- Cost performance index (CPI)
- Quality metrics and non-conformance reports
Change Management: Establish a formal process for handling inevitable changes:
- Change request documentation
- Impact analysis procedures
- Approval requirements
- Implementation protocols
Project Closure: Properly concluding a project is often overlooked but critical:
- Final inspections and approvals
- Documentation archiving
- Lessons learned sessions
- Client acceptance formalization
One practice I’ve found invaluable is holding a structured lessons learned session at project completion. By documenting what went well and what could improve, each project makes our team stronger for the next one. We don’t just celebrate completion—we celebrate what we’ve learned.
On my last major project, we identified five process improvements during our closure review that we’ve now implemented as standard practices across all new projects. One simple change—requiring geotechnical reviews at 30% design instead of 60%—has already prevented costly redesign work on two subsequent projects.
You can learn more about effective project monitoring techniques in our video lectures designed specifically for engineering students.
Key Takeaway: Consistent monitoring and control processes help you identify and address issues early when they’re still manageable. Establish clear metrics for measuring progress, implement a formal change management system, and always conduct a thorough project closure review to capture lessons learned.
Common Beginner Mistakes in Project Planning
In my 15+ years in civil engineering, I’ve seen new engineers make the same planning mistakes repeatedly:
Overly Optimistic Scheduling
New engineers often create schedules based on perfect conditions. I made this mistake early in my career, assuming every activity would finish exactly as planned. Now I follow what I call the “multiply-by-1.5 rule”—whatever duration feels right for an activity, I multiply it by 1.5 for activities with high uncertainty.
Underestimating Site Challenges
Don’t assume site conditions match exactly what’s in the geotechnical report. On my second project, we discovered an unmarked utility line that wasn’t on any as-built drawings. Now I always budget time and money for unexpected site conditions.
Neglecting Stakeholder Input
Many young engineers create plans in isolation, focusing only on technical aspects. I’ve learned that involving key stakeholders—especially future maintenance teams—improves both the plan and everyone’s commitment to it.
Forgetting Weather Impacts
Weather can derail even the best plans. I now research historical weather patterns for the project duration and location, then build in appropriate contingencies for seasonal challenges.
The Future of Civil Engineering Planning
Integrating Sustainable Practices in Project Planning
Sustainability is no longer optional in civil engineering—it’s a fundamental consideration that should be integrated throughout the planning process.
Best practices for sustainable planning include:
Life Cycle Assessment: Evaluate environmental impacts across the entire project lifespan, from material extraction through construction, operation, and eventual demolition.
Green Material Specification: Incorporate recycled content, locally sourced materials, and low-embodied carbon options where possible. On my projects, I’ve started requiring concrete with supplementary cementitious materials that reduce our carbon footprint while maintaining performance.
Energy Efficiency Planning: Design for reduced energy consumption during both construction and operation phases. This includes planning construction site layouts to minimize equipment travel and idle time.
Water Conservation Strategies: Implement stormwater management, water reuse systems, and efficient fixtures.
For a recent commercial development, we reduced the project’s carbon footprint by 27% through careful material selection and innovative design approaches identified during the planning phase. Simply changing our asphalt specification to include recycled material diverted over 2,000 tons of waste from landfills.
Certification systems like LEED, Envision, and BREEAM provide structured frameworks for implementing sustainable practices. According to the U.S. Green Building Council, LEED-certified buildings consume 25% less energy and 11% less water compared to conventional buildings.
Utilizing Technology and Tools for Efficient Planning
The digital transformation of civil engineering has revolutionized project planning capabilities:
Building Information Modeling (BIM): Beyond 3D modeling, BIM enables:
- Clash detection to identify conflicts before construction
- 4D scheduling that links model elements to timeline
- 5D cost estimation that connects design decisions to budget impact
- Virtual reality walkthroughs for stakeholder review
On my latest water treatment plant project, our BIM model identified 47 pipe conflicts before construction began. Fixing these issues virtually saved us an estimated $180,000 in field rework costs.
Project Management Software: Tools like Procore, Primavera P6, and Microsoft Project provide:
- Real-time progress tracking
- Resource management
- Document control
- Team collaboration features
Data Analytics: Advanced analytics offer:
- Predictive modeling for risk assessment
- Performance benchmarking against similar projects
- Pattern recognition for identifying potential issues
Mobile Solutions: Field applications enable:
- Real-time data collection
- Immediate issue reporting
- Drawing and document access onsite
- Photo documentation linked to location data
According to McKinsey & Company, construction projects that implement appropriate digital tools can reduce project completion times by up to 30% and cut costs by up to 45%.
I’ve found that the key is not adopting technology for its own sake, but strategically implementing tools that address specific planning challenges within your organization. When we first adopted BIM, we focused solely on using it for clash detection, mastering that capability before moving on to 4D scheduling integration.
Learning from Success: Civil Engineering Planning Case Studies
Case Study 1: Urban Bridge Replacement Project
A 70-year-old bridge in a densely populated area needed replacement while maintaining traffic flow. The planning challenges included:
- Limited workspace
- High traffic volumes
- Nearby historic structures
- Multiple utility relocations
Planning Strategy: The team implemented a phased construction approach with temporary structures to maintain traffic flow. They used 4D BIM modeling to visualize each construction stage and identify potential conflicts.
Results: The project was completed two months ahead of schedule with minimal traffic disruption. The detailed planning allowed for precise scheduling of lane closures during off-peak hours, reducing community impact.
Key Lesson: Investing in advanced modeling during planning paid for itself many times over by preventing costly surprises during construction.
Case Study 2: Rural Water Supply System
A small community needed a comprehensive water supply system including wells, treatment facilities, and distribution networks across challenging terrain.
Planning Strategy: The team divided the project into independent work packages that could proceed simultaneously. They implemented a risk-based approach that prioritized geotechnical investigations in areas with uncertain conditions.
Results: Despite discovering unexpected rock formations that required plan modifications, the project finished within 5% of the original budget due to the contingency planning and flexible work package approach.
Key Lesson: Creating independent work packages with their own resource allocation plans allows for greater flexibility when conditions change.
Your Project Planning Questions Answered
How do you plan a construction project?
Planning a construction project follows these essential steps:
- Define project scope with clear deliverables and boundaries
- Create detailed cost estimates and budgets
- Develop comprehensive schedules with resource allocations
- Implement risk management strategies
- Establish quality control procedures
- Create communication protocols
- Set up monitoring and control systems
The key is making each step specific to your project’s unique requirements rather than using generic templates. On my reservoir expansion project, we modified our standard quality control procedures to include additional testing specifically for the specialized liner material we were using.
What are the essential components of a project plan?
A complete civil engineering project plan includes:
- Scope statement with clear objectives
- Work breakdown structure (WBS)
- Budget with cost estimates
- Project schedule with dependencies
- Resource allocation plan
- Risk register and response strategies
- Quality management approach
- Communication plan
- Procurement requirements
These components should be living documents that evolve as the project progresses. I typically review and update our risk register every two weeks throughout the project lifecycle.
What project management software is best for civil engineers?
The best software depends on your specific needs, but popular options include:
- Primavera P6: Excellent for complex, large-scale projects with sophisticated scheduling needs. This is my go-to for projects over $10 million.
- Microsoft Project: Good balance of functionality and accessibility for medium-sized projects. Great if you need to share schedules with clients who may not have specialized software.
- Procore: Strong field management capabilities with mobile integration. We’ve found this particularly useful for projects with multiple subcontractors.
- Autodesk Construction Cloud: Seamless integration with BIM and design tools. Invaluable if you’re already using Revit or Civil 3D.
I recommend evaluating options based on your team’s specific workflow, existing systems, and the complexity of your typical projects. Don’t just choose what’s popular—choose what solves your particular planning challenges.
How can I ensure my project is sustainable?
To enhance project sustainability:
- Conduct environmental impact assessments early in planning
- Set specific sustainability goals and metrics
- Prioritize locally sourced materials to reduce transportation impacts
- Incorporate renewable energy systems where feasible
- Design for future adaptability and resilience
- Implement construction waste management plans
- Consider lifecycle costs rather than just initial construction costs
Sustainability considerations should be integrated into every planning decision rather than treated as an add-on. On my last project, we evaluated every major material choice using a simple sustainability scorecard that considered embodied carbon, recyclability, and local sourcing.
How Project Planning Skills Boost Your Engineering Career
The planning skills you develop as a civil engineer can open doors beyond traditional project roles. In my career, I’ve seen colleagues leverage these skills to move into:
- Construction Management: Where detailed planning expertise is directly applicable
- Risk Management: Using analytical skills to identify and mitigate organizational risks
- Consulting: Helping organizations implement planning best practices
- Sustainability Coordination: Leading sustainable design and planning initiatives
My own planning experience helped me secure a role leading our company’s BIM implementation initiative, which expanded my career in directions I hadn’t anticipated.
Strong planning skills make you valuable regardless of economic conditions—when times are good, you help maximize efficiency on growing projects; when times are tight, you help optimize resources on limited budgets.
Conclusion
Project planning in civil engineering is both an art and a science. The seven steps outlined here provide a framework that can be adapted to projects of any scale or complexity:
- Project Initiation and Scope Definition
- Budgeting and Cost Estimation
- Scheduling and Resource Allocation
- Risk Management and Mitigation
- Quality Control and Assurance
- Communication and Collaboration
- Monitoring, Control, and Project Closure
What separates exceptional civil engineers from average ones isn’t just technical knowledge—it’s the ability to plan effectively, anticipate challenges, and organize resources to deliver successful projects.
I’ve learned something new from every project I’ve managed—from my first bridge renovation to my most recent highway expansion. You will too. Each project is a chance to refine your planning process and become a more valuable engineer.
Whether you’re working on your first project or your fiftieth, continuous improvement in your planning approach will yield better results. I encourage you to develop your own templates and checklists based on these principles, tailored to your specific practice areas.
Want to stand out in your next job interview? Check out our interview preparation resources where you’ll find specific questions about project planning that employers often ask civil engineers. And while you’re building your career toolkit, our Resume Builder can help you highlight your planning skills effectively.
Remember that great civil engineers don’t just build structures—they build better communities through thoughtful, responsible planning.
Leave a Reply