Category: Civil Engineering

  • Unlocking Success: 5 Key Project Management Strategies in Civil Engineering

    Unlocking Success: 5 Key Project Management Strategies in Civil Engineering

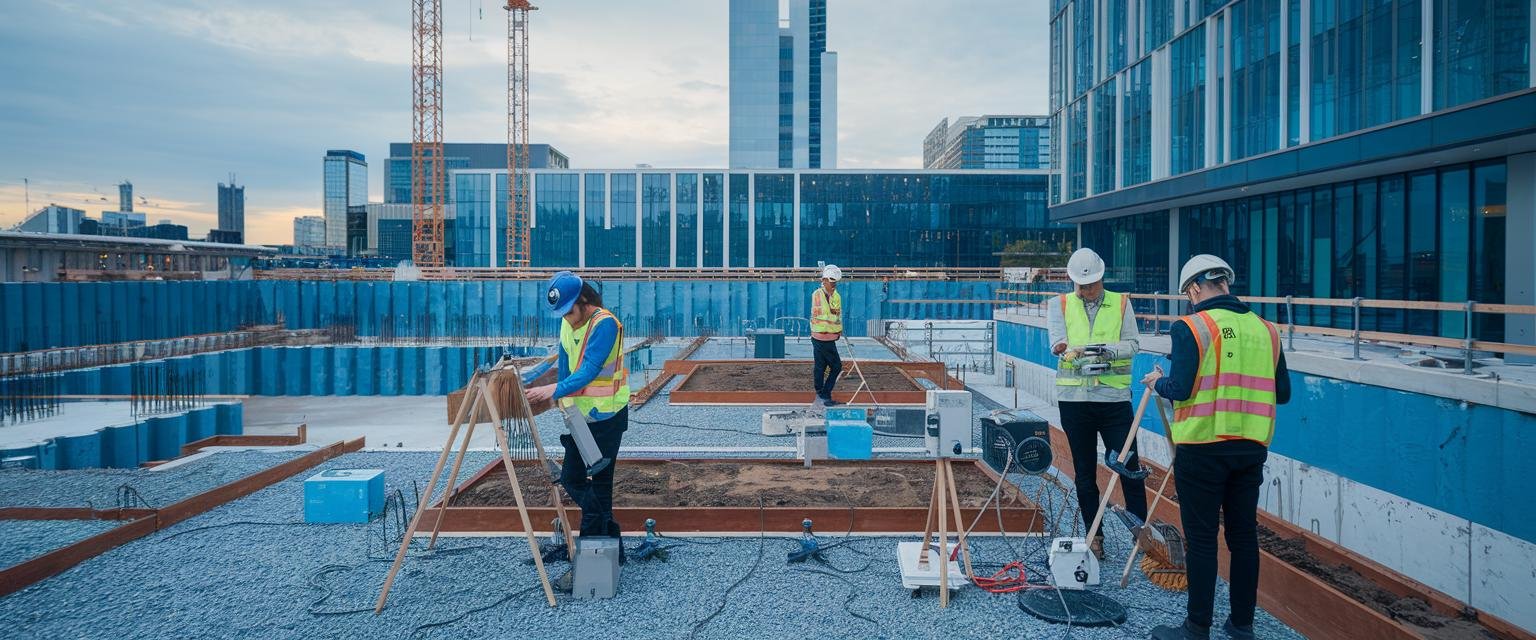
    According to a recent industry report, nearly 70% of construction projects exceed their budgets, and 75% miss their completion deadlines. These failures aren’t just numbers—they represent real costs, both financial and reputational. As someone who has witnessed the chaos of poorly managed construction sites firsthand, I can tell you that effective project management in civil engineering isn’t just important—it’s essential.

    During my early career days, I remember visiting a bridge construction site where timeline estimates had been wildly optimistic and coordination between teams was practically non-existent. Watching skilled engineers struggle with preventable problems made me realize how crucial structured project management actually is in turning designs into reality.

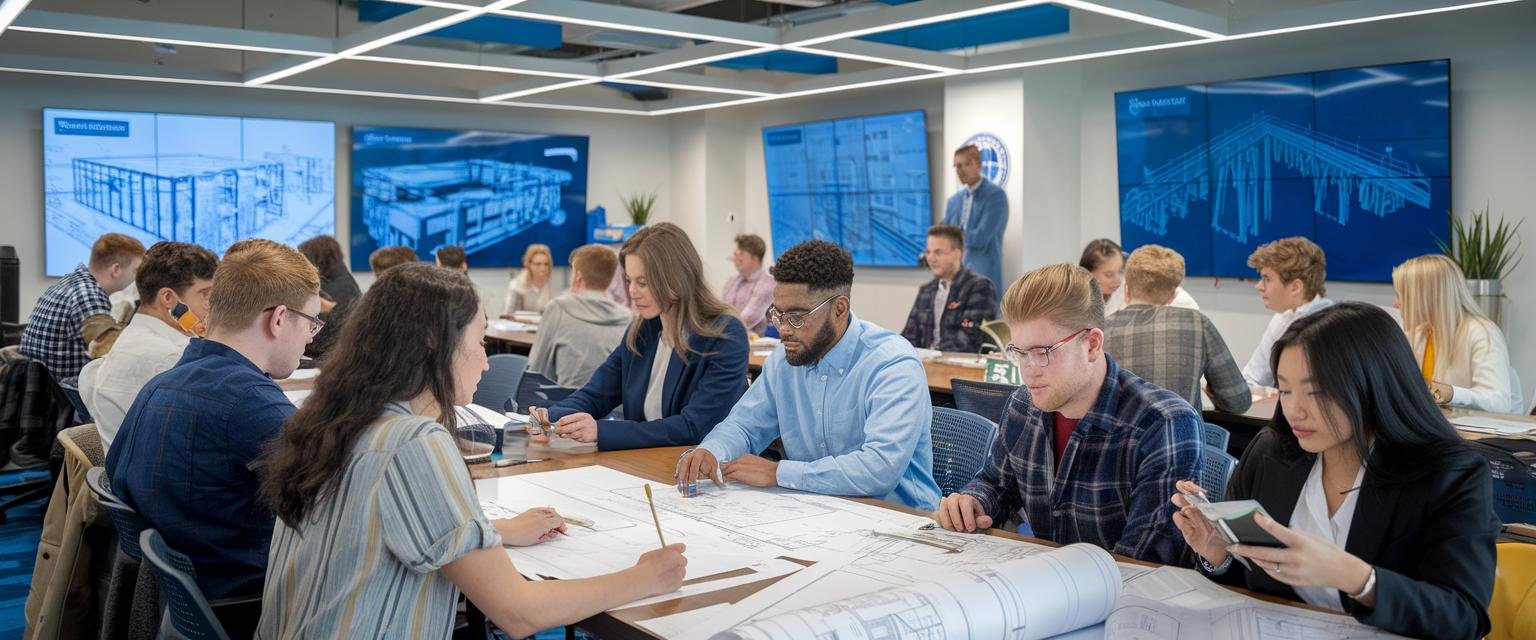
    In this post, we’ll explore five key project management strategies that can transform how civil engineering projects are executed, helping students and early-career professionals bridge the gap between theoretical knowledge and practical application.

    Understanding Project Management in Civil Engineering: The Foundation of Success

    Project management in civil engineering goes far beyond scheduling and budgeting. It’s the comprehensive process of planning, organizing, securing, and managing resources to achieve specific engineering goals within defined constraints.

    Think about what happens on a typical construction site: multiple contractors working simultaneously, materials arriving daily, permits requiring approval, and stakeholders expecting regular updates. Without effective project management, this complexity quickly devolves into costly chaos.

    Why does this matter so much in civil engineering specifically? Because our projects tend to be:

    • Physically massive (buildings, bridges, highways)
    • Extremely expensive (often millions or billions of dollars)
    • Long-duration (months or years, not weeks)
    • Highly regulated (building codes, environmental requirements)
    • Publicly visible and scrutinized
    • Directly impacting public safety

    When a software project fails, a company might lose money. When a civil engineering project fails, people’s safety could be at risk, communities might be disrupted, and enormous resources might be wasted.

    What Makes Project Management Different in Civil Engineering?

    Civil engineering project management requires a unique blend of technical engineering knowledge and management skills. You need to understand both the structural integrity requirements of a foundation and how to manage the team installing it.

    The stakes are also higher. While all projects face challenges, civil engineering projects often deal with immovable constraints like weather conditions, site-specific challenges, and rigid regulatory requirements that can’t be negotiated away.

    Key Takeaway: Project management in civil engineering combines technical expertise with management skills to coordinate complex projects with high public visibility and safety implications. It’s not an add-on skill but a core competency for successful civil engineers.

    Strategy 1: Mastering the Project Lifecycle

    The civil engineering project lifecycle follows a structured approach that helps manage complexity through distinct phases. Understanding these phases is crucial for maintaining control throughout the project.

    Initiation: Getting It Right From the Start

    The first phase sets the foundation for everything that follows. During initiation, you’ll:

    • Define project goals and objectives (using SMART criteria)
    • Identify key stakeholders and their expectations
    • Develop a business case and feasibility studies
    • Secure initial approvals and funding

    I once worked on a project where we rushed through this phase to “save time.” The result? We had to revisit fundamental questions mid-construction, causing delays that cost far more than the time we thought we were saving.

    Planning: Where Success Truly Begins

    The planning phase is where you create your roadmap. This includes:

    1. Developing a detailed Work Breakdown Structure (WBS)
    2. Creating a schedule with realistic timelines
    3. Estimating costs and establishing a budget
    4. Identifying required resources
    5. Establishing quality standards
    6. Developing risk management strategies

    The WBS deserves special attention. By breaking down the project into manageable components—think of it as creating a detailed recipe for your project—you create clarity about what needs to be done and who’s responsible. This prevents the common problem of tasks “falling through the cracks.”

    Execution: Bringing Plans to Life

    During execution, you’ll:

    • Coordinate team activities and resources
    • Implement quality control measures
    • Manage stakeholder communications
    • Process change requests
    • Document progress and issues

    This phase is where your leadership skills become particularly important. Teams need clear direction, timely decisions, and effective conflict resolution.

    Monitoring and Controlling: Staying on Track

    This phase happens concurrently with execution and involves:

    • Tracking actual progress against the plan
    • Monitoring costs against the budget
    • Implementing corrective actions when needed
    • Managing scope changes through a formal process
    • Conducting regular risk assessments

    One particularly effective technique is earned value management (EVM), which allows you to measure project performance objectively. EVM helps you answer crucial questions like “Are we behind schedule?” and “Are we over budget?” with concrete data rather than impressions.

    Closure: Finishing Strong

    The final phase includes:

    • Completing all deliverables
    • Getting final approvals
    • Releasing resources
    • Documenting lessons learned
    • Transitioning to operations

    Many teams neglect proper closure, eager to move on to the next project. This is a mistake. The lessons learned during a project are invaluable for improving future performance.

    Key Takeaway: Each phase of the project lifecycle serves a specific purpose. Rushing through or skipping phases typically leads to problems later. Investing time in thorough planning and diligent monitoring pays dividends throughout the project’s life.

    Strategy 2: Leveraging Tools and Technology for Project Control

    The days of managing projects with just paper plans and spreadsheets are long gone. Today’s civil engineering projects demand sophisticated digital tools to manage their complexity.

    Project Management Software: Digital Command Centers

    Modern project management tools give teams unprecedented visibility and control. Here’s a comparison of popular options:

    Software Best For Key Features
    Microsoft Project Medium to large projects Comprehensive scheduling, resource management, familiar interface
    Primavera P6 Large, complex projects Multi-project management, risk analysis, industry standard for major infrastructure
    Procore Construction-specific needs Field management, quality control, RFI tracking
    Asana/Trello Team collaboration User-friendly interfaces, task assignment, better for smaller projects

    The key is choosing software that matches your specific project needs. For smaller projects, lighter tools like Asana might be sufficient. For complex infrastructure projects, robust solutions like Primavera P6 are often necessary.

    According to a Construction Management Association of America report, projects that utilize specialized software experience 35% fewer delays and 25% fewer budget overruns.

    BIM: Bringing Designs to Life Before Breaking Ground

    Building Information Modeling (BIM) has transformed how civil engineering projects are planned and executed. Unlike traditional 2D plans, BIM creates detailed 3D models containing information about every project component.

    Think of BIM as creating a virtual twin of your project before construction begins. This digital approach offers several game-changing benefits:

    • Clash detection: Finding conflicts between systems (like when a beam would hit a duct) before construction begins
    • Better visualization: Helping clients see exactly what they’re getting
    • 4D scheduling: Linking models with timelines to visualize construction sequences
    • 5D cost estimation: Getting more accurate material quantities and costs
    • Improved coordination: Creating one source of truth for all teams

    On a recent highway overpass project, our BIM model caught a utility conflict that would have cost weeks of delays if discovered during construction. The upfront modeling time paid for itself many times over.

    Mobile Technologies: Taking Management to the Field

    Today’s project managers aren’t tied to the office. Mobile technologies enable:

    • Real-time progress updates from the field
    • On-site access to plans and specifications
    • Photo and video documentation of issues
    • Immediate communication with team members
    • Digital sign-offs and approvals

    Tools like PlanGrid and FieldWire have made it possible to carry entire sets of construction documents in your pocket and mark up changes in real-time.

    Key Takeaway: The right technology stack can dramatically improve project visibility, coordination, and control. Invest time in selecting appropriate tools and training your team to use them effectively. The initial learning curve is far outweighed by long-term efficiency gains.

    Strategy 3: Embracing Sustainability in Project Management

    Sustainability isn’t just a buzzword—it’s becoming a fundamental requirement in civil engineering projects. Effective project managers now integrate sustainable practices throughout the project lifecycle.

    The Triple Bottom Line Approach

    Modern project management considers three key dimensions:

    1. Economic sustainability: Ensuring the project makes financial sense not just in construction but throughout its lifecycle
    2. Environmental sustainability: Minimizing negative environmental impacts
    3. Social sustainability: Creating positive outcomes for communities and addressing stakeholder concerns

    This approach requires thinking beyond initial construction to consider the entire lifecycle of the structure or infrastructure being built.

    Practical Sustainability Strategies

    Here are specific ways to incorporate sustainability into your project management approach:

    • Materials selection: Choose recycled, renewable, or locally sourced materials when possible
    • Energy efficiency: Design for reduced energy consumption during both construction and operation
    • Waste reduction: Implement construction waste management plans to minimize landfill impact
    • Water conservation: Incorporate systems for rainwater harvesting, greywater reuse, and efficient fixtures
    • Site impact minimization: Protect natural features and reduce disruption to local ecosystems

    One particularly effective approach is to pursue certification under systems like LEED (Leadership in Energy and Environmental Design) or Envision, which provide frameworks for sustainable infrastructure.

    According to the U.S. Green Building Council, LEED-certified buildings typically use 25-30% less energy and 15% less water, while generating significant waste reduction.

    Measuring and Reporting Sustainability Performance

    What gets measured gets managed. Consider implementing:

    • Carbon footprint tracking
    • Construction waste diversion rates
    • Energy modeling and performance tracking
    • Water usage monitoring
    • Post-occupancy evaluations

    These metrics help quantify the impact of sustainability initiatives and provide valuable data for future projects.

    Key Takeaway: Sustainability is no longer optional in civil engineering project management. By integrating sustainable practices from the beginning, you can reduce environmental impact, lower lifecycle costs, and create more value for stakeholders.

    Strategy 4: Mastering Communication and Stakeholder Management

    I’ve seen technically excellent projects fail because of poor communication. In civil engineering, where multiple stakeholders have different (and sometimes conflicting) priorities, communication isn’t just important—it’s everything.

    Identifying and Analyzing Stakeholders

    Start by mapping all stakeholders and their interests:

    • Client/owner
    • Design team
    • Construction contractors and subcontractors
    • Regulatory authorities
    • End users
    • Community members
    • Utility companies
    • Financial institutions

    For each stakeholder, assess:

    1. Their level of interest in the project
    2. Their level of influence
    3. Their primary concerns and expectations
    4. Preferred communication methods and frequency

    This analysis helps prioritize communication efforts and tailor messages appropriately. For example, on a recent municipal project, we identified that local business owners were highly concerned about construction disrupting customer access. By recognizing this early, we created a phased construction plan that minimized impact on business hours and maintained clear access signage throughout the project.

    Developing a Communication Management Plan

    A formal communication plan prevents information gaps and ensures stakeholders receive the information they need. Include:

    1. Communication objectives
    2. Stakeholder analysis
    3. Communication methods and frequency
    4. Roles and responsibilities
    5. Distribution methods
    6. Feedback mechanisms

    Different stakeholders need different information. For example:

    • Clients need progress updates, cost information, and decision requests
    • Team members need detailed instructions, schedules, and technical information
    • Regulatory authorities need compliance documentation
    • Community members need information about impacts and benefits

    Managing Conflict Effectively

    Conflict is inevitable in complex projects. Effective project managers:

    • Address issues promptly before they escalate
    • Focus on interests rather than positions
    • Use data to ground discussions
    • Document agreements and follow up
    • Know when to escalate to higher authorities

    I once managed a project where neighboring property owners were concerned about construction noise. Instead of dismissing their concerns, we worked with them to adjust work hours and implement additional noise mitigation measures. This proactive approach prevented potential legal challenges that could have delayed the project.

    Building Trust Through Transparency

    Trust is built through consistent, honest communication—even when the news isn’t good. When problems arise (and they always do), communicating them promptly along with a plan to address them maintains stakeholder confidence.

    Key Takeaway: Effective communication requires planning, not just talking. Develop a communication strategy tailored to each stakeholder’s needs and consistently deliver on your communication commitments. When issues arise, address them transparently and promptly.

    Strategy 5: Continuous Improvement Through Lessons Learned

    The best project managers don’t just complete projects—they learn from them. Each project provides valuable insights that can improve future performance.

    Capturing Lessons Throughout the Project

    Don’t wait until the end to start documenting lessons. Implement a continuous learning process:

    1. Regular team reflections (weekly or monthly)
    2. Issue logs with resolution notes
    3. Risk response effectiveness tracking
    4. Innovation and improvement idea collection

    Simple questions like “What went well this week?” and “What could we improve?” can yield valuable insights when asked consistently.

    Conducting Effective Post-Project Reviews

    At project completion, conduct a thorough review using this structured approach:

    Review Area Questions to Ask Documentation Method
    Schedule Performance Were milestones met? What caused delays? Which activities took less time than expected? Variance analysis with root causes
    Cost Management Were estimates accurate? Which items exceeded budget? Where did we save money? Budget comparison spreadsheet
    Quality Outcomes Did we meet specifications? Were there rework issues? How effective were our QA/QC processes? Quality incident log with solutions
    Team Performance How well did teams collaborate? Were roles clear? Did we have the right skills? Team survey and facilitated discussion

    Make sure these sessions don’t become blame games. Focus on systemic issues rather than individual mistakes, and always emphasize the goal of improvement rather than criticism.

    Creating Organizational Knowledge

    Individual learning only helps if it becomes organizational knowledge. Consider:

    • Creating a searchable lessons-learned database
    • Developing case studies from significant projects
    • Updating templates and processes based on findings
    • Sharing insights through lunch-and-learns or internal newsletters

    When I started at my first engineering firm, I was amazed at how many projects encountered the same preventable issues. The problem wasn’t that people weren’t learning—it was that the organization wasn’t capturing and sharing that learning effectively.

    Personal Development as a Project Manager

    Finally, commit to your own professional growth:

    • Seek feedback on your management approach
    • Stay current with industry trends and best practices
    • Pursue relevant certifications (PMP, CCM, LEED AP)
    • Build relationships with mentors and peers

    At Colleges to Career, we offer specialized video lectures on project management techniques specifically tailored for engineering students transitioning to professional roles.

    Key Takeaway: Make learning a deliberate process, not an afterthought. Document lessons systematically, share knowledge widely, and commit to continuous personal development. Each project should make you and your organization more effective at managing the next one.

    Frequently Asked Questions

    How does project management work in construction?

    Construction project management applies standard project management principles to the specific challenges of building physical structures. The process typically follows these steps:

    1. Pre-construction planning: Defining scope, creating estimates, developing schedules, and securing permits
    2. Resource coordination: Mobilizing labor, equipment, and materials according to the schedule
    3. Progress monitoring: Tracking actual vs. planned performance for schedule and cost
    4. Quality control: Ensuring work meets specifications and building codes
    5. Safety management: Implementing and enforcing safety protocols
    6. Change management: Processing modifications to scope, schedule, or budget
    7. Closeout: Completing punch lists, obtaining occupancy permits, and transitioning to operations

    Construction project management requires balancing the classic “triple constraint” of scope, time, and cost while maintaining quality and safety standards.

    What skills are essential for project management in civil engineering?

    Successful civil engineering project managers combine technical knowledge with management capabilities:

    • Technical understanding: Ability to comprehend engineering principles and construction methods
    • Planning and organization: Creating realistic schedules and resource allocations
    • Financial management: Developing and tracking budgets, managing cash flow
    • Risk assessment: Identifying potential issues and developing mitigation strategies
    • Communication: Clearly conveying information to diverse stakeholders
    • Leadership: Motivating teams and making decisions under pressure
    • Problem-solving: Finding creative solutions to unexpected challenges
    • Negotiation: Working with contractors, suppliers, and stakeholders to resolve conflicts
    • Regulatory knowledge: Understanding permits, codes, and compliance requirements
    • Digital literacy: Proficiency with project management software and BIM

    The most effective project managers continually develop both their technical and interpersonal skills.

    How can I implement BIM on my projects?

    Implementing BIM effectively requires a strategic approach:

    1. Start with clear objectives: Define what you want to achieve with BIM (visualization, clash detection, quantity takeoffs, etc.)
    2. Establish BIM requirements: Create a BIM Execution Plan (BEP) that outlines modeling standards, level of detail, and information exchange protocols
    3. Ensure team capability: Verify that all team members have the necessary skills and software
    4. Begin with pilot projects: Start with smaller, less complex projects to build capability
    5. Plan for integration: Determine how BIM will connect with other systems (scheduling, cost estimating, facility management)
    6. Measure results: Track benefits like reduced RFIs, fewer change orders, and improved coordination

    Remember that BIM is more than software—it’s a collaborative process that requires changes to traditional workflows.

    What are the biggest challenges in civil engineering project management?

    Common challenges include:

    1. Scope creep: Expanding requirements without corresponding adjustments to schedule or budget
    2. Unrealistic schedules: Pressure to commit to aggressive timelines despite known risks
    3. Resource constraints: Limited availability of skilled labor, specialized equipment, or materials
    4. Communication breakdowns: Information silos between design, engineering, and construction teams
    5. Regulatory hurdles: Navigating complex permitting and approval processes
    6. Weather and site conditions: Dealing with uncontrollable environmental factors
    7. Stakeholder management: Balancing competing interests from clients, communities, and authorities

    Addressing these challenges requires proactive planning, clear communication, and agile response to changing conditions.

    Conclusion: Bringing It All Together

    Effective project management in civil engineering combines technical knowledge with strategic thinking and people skills. By mastering the five strategies we’ve discussed—understanding the project lifecycle, leveraging technology, embracing sustainability, excelling at communication, and committing to continuous improvement—you’ll be well-equipped to deliver successful projects.

    Remember that project management isn’t just about following processes—it’s about leadership and decision-making in complex, dynamic environments. The best project managers are those who can adapt their approach to each project’s unique challenges while maintaining focus on fundamental principles.

    As you continue your journey from college to career in civil engineering, invest time in developing both your technical expertise and your project management capabilities. These complementary skill sets will make you invaluable to employers and set you up for long-term success in the industry.

    Ready to take your project management skills to the next level? Check out our comprehensive interview preparation resources that include practice questions specifically for project management roles in engineering fields.

  • Top 5 Transformative Benefits of Using Microsoft Project for Civil Engineering

    Top 5 Transformative Benefits of Using Microsoft Project for Civil Engineering

    Did you know that over 85% of civil engineering projects run late and cost more than planned? I’ve seen this happen countless times in my career. When I was working on my first major infrastructure project after graduating from Jadavpur University, it was absolute chaos. Our team tried managing everything with spreadsheets and emails, and we quickly lost track of crucial dependencies and resource allocations.

    Microsoft Project could have saved us weeks of rework and thousands in cost overruns. This powerful project management software offers specialized tools that transform how civil engineering projects are planned, executed, and monitored.

    Whether you’re a student preparing to enter the workforce or a professional looking to upgrade your project management skills, understanding Microsoft Project can give you a significant advantage in the civil engineering field.

    5 Ways Microsoft Project Transforms Civil Engineering Project Management

    In this guide, I’ll walk you through the top 5 ways Microsoft Project can transform your approach to civil engineering projects, making them more efficient, predictable, and successful. After implementing these techniques in my own projects, I’ve seen completion times improve by up to 20% and budget overruns decrease significantly.

    Learn more about essential career skills for engineers

    Transform Your Timelines: The Power of Microsoft Project Scheduling in Civil Engineering

    The backbone of any successful civil engineering project is a well-structured schedule. In complex projects like highway construction or water treatment facilities, coordinating hundreds of interconnected tasks becomes nearly impossible without proper tools.

    Microsoft Project makes scheduling easy with colorful Gantt charts that show you at a glance:

    • Task durations and relationships
    • Dependencies between activities
    • The critical path (tasks that directly impact project completion)
    • Resource allocations across the timeline
    • Milestone tracking

    I once helped a small bridge construction project transition from Excel-based planning to Microsoft Project. The impact was immediate. By visualizing the critical path, we discovered that foundation work was creating a bottleneck. This simple insight allowed us to adjust our resource allocation and complete the project two weeks ahead of schedule.

    For civil engineers, the ability to set task dependencies is particularly valuable. For example, you can specify that concrete pouring can’t begin until after site excavation is complete AND the concrete has been delivered. MS Project will automatically adjust downstream tasks if there’s a delay in either prerequisite.

    Specialized Scheduling Features for Engineers

    The software also handles specialized scheduling needs like:

    • Split tasks (work that can be paused and resumed later)
    • Lag time (waiting periods between tasks, like concrete curing)
    • Lead time (overlapping tasks, like starting design work before site surveys are fully complete)

    A real-world example is roadway construction. Using Microsoft Project, you can sequence pavement removal, utility relocation, grading, base installation, and final paving—all while considering weather conditions, traffic control requirements, and equipment availability.

    Key Takeaway: Microsoft Project’s Gantt chart visualization transforms complex civil engineering schedules into clear visual timelines, helping identify critical paths and potential bottlenecks before they cause delays.

    Maximizing Efficiency: Mastering Resource Management with Microsoft Project

    Managing resources in civil engineering is like conducting an orchestra—each piece needs to be in the right place at the right time. This becomes even more complex when dealing with specialized equipment and personnel that are both expensive and limited in availability.

    Microsoft Project offers powerful resource management features that help you:

    1. Track availability of specialized equipment like excavators, cranes, and testing equipment
    2. Prevent overallocation of critical resources
    3. Level resources to distribute work evenly and avoid bottlenecks
    4. Calculate resource costs accurately
    5. Identify when additional resources are needed

    Let me share a practical example from a drainage system upgrade project I worked on. We had only two excavators available for multiple trenching operations. Using MS Project’s resource leveling feature, we optimized the schedule to ensure excavators moved efficiently between sites, eliminating costly downtime and preventing delays.

    Work-Driven vs. Duration-Driven Tasks

    What makes Microsoft Project particularly useful for civil engineers is its ability to handle both work-driven and duration-driven tasks:

    • Work-driven: Adding more workers to a task like placing rebar can decrease duration
    • Duration-driven: Tasks like concrete curing take a fixed amount of time regardless of resources

    The software also excels at tracking specialized civil engineering resource types that other tools often overlook:

    • Licensed surveyors and inspectors
    • Specialized equipment operators
    • Permitting officials
    • Traffic control crews
    • Environmental monitoring staff

    By assigning costs to these resources, Project automatically calculates budget impacts as you adjust the schedule—giving you immediate feedback on the financial consequences of project decisions.

    Key Takeaway: Microsoft Project’s resource management capabilities help civil engineers prevent overallocation of expensive equipment and specialized personnel, optimize resource utilization, and accurately predict project costs throughout execution.

    Want to improve your project management skills and build your career? Check out our engineering video lectures today!

    Connecting the Dots: Streamlining Communication on Civil Engineering Projects

    One of the biggest challenges in civil engineering projects isn’t technical—it’s communication. With multiple stakeholders including designers, contractors, subcontractors, regulatory agencies, and clients, keeping everyone on the same page can be daunting.

    Microsoft Project integrates seamlessly with other Microsoft tools to create a unified communication platform:

    • Integration with Teams: Share project updates, discuss design changes, and resolve issues in real-time
    • SharePoint connectivity: Store and manage project documents, specifications, and drawings
    • Excel reports: Export customized reports for stakeholders with varying information needs
    • Power BI dashboards: Create interactive visualizations of project progress

    For example, when working on site development projects, we used Project’s integration with Teams to create dedicated channels for each major component: earthwork, utilities, structures, and landscaping. This allowed specialists to focus on their areas while maintaining visibility across the entire project.

    Single Source of Truth

    The real power comes from having a single source of truth. When a change occurs—say a material delivery is delayed—updating it in Microsoft Project automatically reflects across all connected platforms. This eliminates confusion and ensures everyone works from current information.

    Another valuable feature is Project’s ability to generate targeted communications for different stakeholders:

    • Detailed technical schedules for the engineering team
    • Simplified milestone reports for clients
    • Resource-specific task lists for subcontractors
    • Financial summaries for project sponsors

    I’ve found that this integrated communication approach reduces email volume by about 40% on typical projects and virtually eliminates the “I didn’t know that changed” problems that plague many engineering initiatives.

    Key Takeaway: Microsoft Project creates a centralized communication hub when integrated with Teams and SharePoint, ensuring all stakeholders access the same up-to-date project information and reducing miscommunication that often leads to costly mistakes.

    Mitigating Risks: Using Microsoft Project to Ensure Engineering Project Success

    Civil engineering projects face unique risks—from unexpected soil conditions to weather delays to regulatory hurdles. While Microsoft Project isn’t primarily a risk management tool, it provides several features that help identify, track, and mitigate risks.

    The critical path feature highlights tasks that can’t be delayed without pushing back your entire project deadline. This helps you know exactly where to focus your attention.

    Quality Management Features

    For quality management, Microsoft Project allows you to:

    • Schedule regular inspections and quality control checkpoints
    • Link testing activities to construction milestones
    • Allocate sufficient time for reviews and approvals
    • Track corrective actions when quality issues arise

    On a bridge rehabilitation project I supported, we used Microsoft Project to schedule concrete strength testing at specific intervals after pouring. The software automatically flagged when tests were approaching and helped us coordinate third-party testing services in advance.

    You can also use custom fields to track risk levels for different activities. For tasks with high-risk ratings, you might add buffer time or assign additional resources as a mitigation strategy.

    “Proper scheduling is the first step in risk management,” explains Rajiv Singh, a civil engineering project manager with 15 years of experience. “Microsoft Project helps us identify potential bottlenecks months in advance, giving us time to develop contingency plans.” (Source: Project Management Institute)

    For environmental compliance—a critical concern in many civil projects—you can schedule regular monitoring activities and link them to construction phases, ensuring regulatory requirements remain visible throughout the project lifecycle.

    Key Takeaway: While not specifically designed for risk management, Microsoft Project helps civil engineers identify critical path activities, schedule quality control checkpoints, and visualize potential schedule impacts, enabling proactive risk mitigation.

    Stay on Track: Making Data-Driven Decisions in Microsoft Project

    One of the most powerful aspects of Microsoft Project is its ability to transform raw project data into actionable insights through customizable dashboards and reports.

    For your engineering projects, this means you can:

    • See real-time updates on how work is progressing compared to your plan
    • Spot tasks that are falling behind before they cause major problems
    • Keep a close eye on your budget as the project moves forward
    • Find out if your equipment and people are being used effectively
    • Make smart decisions based on facts, not guesswork

    Microsoft Project’s tracking Gantt chart visually displays completed work against the baseline plan, making it immediately obvious when a project starts veering off course.

    Practical Tracking for Civil Engineers

    For example, in a highway expansion project, you can track:

    • Percentage of earthwork completed
    • Linear feet of utilities installed
    • Square yards of pavement placed
    • Number of structures completed

    This data-driven approach allows civil engineers to make informed decisions rather than relying on gut feelings or outdated information.

    The software also calculates earned value metrics like Cost Performance Index (CPI) and Schedule Performance Index (SPI), giving objective measures of project health. These indicators provide early warning signs when projects begin trending in the wrong direction.

    I once turned around a troubled stormwater management project by implementing MS Project dashboards that highlighted which specific activities were behind schedule. This clarity allowed us to target our recovery efforts precisely where they were needed.

    Custom Reports for Different Audiences

    The reporting capabilities are equally impressive. With just a few clicks, you can generate:

    • S-curve charts showing cumulative progress
    • Resource utilization reports
    • Milestone tracking summaries
    • Cost variance analyses

    These reports can be tailored for different audiences—from detailed technical data for the engineering team to high-level summaries for executives and clients.

    Key Takeaway: Microsoft Project’s dashboards and reports transform project data into visual insights, allowing civil engineers to quickly identify deviations from the plan, make data-driven decisions, and communicate progress effectively to all stakeholders.

    Key Microsoft Project Features for Civil Engineering Professionals

    Beyond the major benefits we’ve discussed, Microsoft Project offers several specialized features particularly valuable for civil engineering projects:

    1. Work Breakdown Structure (WBS)

    The WBS feature helps break down complex projects into manageable pieces. For a highway project, your WBS might include:

    • Site preparation
      • Clearing and grubbing
      • Temporary erosion control
    • Earthwork
      • Excavation
      • Embankment
    • Drainage structures
      • Culverts
      • Storm drains
    • Paving
      • Base course
      • Surface course
    • Traffic control
      • Signage
      • Striping

    This organization makes complex projects more manageable and ensures nothing falls through the cracks.

    2. Critical Path Method (CPM)

    CPM is essential to engineering scheduling. Microsoft Project automatically calculates and highlights the critical path—the sequence of tasks that will delay your project if any single one falls behind. Understanding your critical path helps you focus on what matters most.

    3. Baseline Comparison

    By saving baseline plans, you can compare actual performance against original estimates. This is invaluable for both current project management and improving future estimates. The variance analysis helps identify patterns in estimating errors over time.

    4. Custom Fields and Formulas

    Microsoft Project allows you to create custom fields specific to civil engineering needs, such as:

    • Soil classification for earthwork activities
    • Concrete strength requirements
    • Permit requirements by task
    • Environmental sensitivity ratings

    You can then use these fields in reports and filters to analyze project data from different perspectives.

    5. Multi-project Management

    For firms managing multiple projects simultaneously, Microsoft Project allows resource sharing across projects. This is particularly useful when specialized equipment or personnel (like survey crews or quality inspectors) are shared across multiple job sites.

    Looking to advance your engineering career? Check out our Resume Builder to highlight your Microsoft Project skills.

    Frequently Asked Questions About Microsoft Project in Civil Engineering

    How is Microsoft Project used in civil engineering?

    Microsoft Project is used in civil engineering to create detailed project schedules, manage resources like equipment and personnel, track project progress, analyze critical paths, and communicate with stakeholders. It helps manage complex dependencies in infrastructure projects like bridges, highways, and water systems, ensuring they’re completed on time and within budget.

    What are the key features of Microsoft Project that are useful for civil engineering projects?

    The most valuable features include Gantt charts for schedule visualization, resource management tools for optimizing equipment and labor allocation, critical path analysis for identifying schedule-critical tasks, baseline tracking for comparing actual vs. planned progress, and integration with other Microsoft tools for improved collaboration. The ability to handle task dependencies is particularly important for sequential civil engineering activities.

    Is Microsoft Project suitable for small civil engineering firms or is it only for large-scale projects?

    Microsoft Project is scalable and beneficial for firms of all sizes. Small firms actually gain proportionally more benefit since they typically have tighter resource constraints and less margin for error. While the learning curve might seem steep initially, even small projects can see significant improvements in organization and efficiency. Microsoft also offers various licensing options to make it accessible for smaller operations.

    What are the alternatives to Microsoft Project for civil engineering project management?

    Alternatives include Primavera P6 (popular in heavy civil and infrastructure), Procore (construction-focused), Asta Powerproject (UK-based but growing globally), and general project management tools like Asana or Smartsheet. While these alternatives have their strengths, Microsoft Project offers advantages in terms of integration with the Microsoft ecosystem, widespread industry adoption, and a balance between power and usability.

    Need more help preparing for job interviews? Review our Civil Engineering Interview Questions to demonstrate your project management knowledge.

    Transforming Civil Engineering Project Management with Microsoft Project

    Throughout this guide, we’ve explored how Microsoft Project transforms civil engineering project management through enhanced scheduling, optimized resource management, streamlined communication, proactive risk handling, and data-driven decision making.

    The software bridges the gap between academic training and real-world project execution—something I wish I’d understood better when transitioning from my engineering studies at Jadavpur University to professional practice.

    For students and early career professionals, becoming proficient with Microsoft Project provides a significant advantage in the job market. Many employers list MS Project experience as a preferred qualification for project engineering roles. In fact, according to a Project Management Institute survey, over 70% of engineering employers value project management software skills in entry-level candidates.

    For experienced engineers, mastering the advanced features can help tackle increasingly complex projects with greater confidence and control.

    As the civil engineering field continues to face pressure to deliver more complex projects with tighter budgets and schedules, effective project management tools are no longer optional—they’re essential for success.

    Want to level up your project management skills and get ahead in your civil engineering career? Check out our easy-to-follow video lectures on Microsoft Project and other must-have technical skills. These hands-on tutorials show you exactly how to apply these tools to real projects. Check out our engineering video lectures today!

    Looking for jobs where you can apply these Microsoft Project skills? Browse our list of Top Companies for Civil Engineers.

  • Civil Engineering: 7 Steps to Kickstart Your Career Today

    Civil Engineering: 7 Steps to Kickstart Your Career Today

    Dreaming of building the future, one bridge, road, or sustainable city at a time? Let’s talk Civil Engineering.

    During my years at Jadavpur University and later working with engineering teams at multinational companies, I’ve watched civil engineers transform abstract ideas into concrete reality (pun intended!). This hands-on experience showed me the real-world impact of civil engineering principles.

    Civil engineering isn’t just about construction—it’s about creating infrastructure that shapes how we live, work, and interact with our environment. When I was consulting on a major bridge project in 2019, I saw how a well-designed structure didn’t just connect two points—it revitalized entire communities.

    Whether you’re a high school student considering your options or a college student planning your next steps, starting your civil engineering journey requires careful planning. The field is evolving rapidly with new sustainable practices and technologies, making it an exciting but sometimes overwhelming path to navigate.

    In this guide, I’ll walk you through 7 practical steps to launch your civil engineering career. From education requirements to salary expectations, we’ll cover everything you need to know to build a solid foundation for your future. Let’s get started!

    Learn more about career resources

    Step 1: Laying the Civil Engineering Foundation: Educational Pathways

    The journey to becoming a civil engineer starts with proper education. Back in 2015 when I was studying engineering at Jadavpur University, my professors hammered home a truth I still share with students today: your educational foundation is everything in civil engineering. My calculus professor’s words still ring in my ears: “You can’t design a bridge if you can’t solve the equations that keep it standing.”

    High School Preparation

    If you’re still in high school, focus on these subjects:

    • Mathematics – Especially calculus and trigonometry, which form the basis for structural calculations
    • Physics – Understanding forces, motion, and energy is crucial for designing stable structures
    • Chemistry – Knowledge of materials science helps you understand concrete, steel, and other building materials
    • Computer Science – Basic programming skills will help with CAD software and other technical tools

    Join engineering clubs or competitions if available. I participated in a bridge-building competition in school, and it taught me more about teamwork and problem-solving than any textbook could! We failed spectacularly the first time—our popsicle stick bridge collapsed under minimal weight—but that failure taught us more about structural integrity than any success would have.

    Undergraduate Studies

    A bachelor’s degree in civil engineering is the minimum requirement for most entry-level positions. Core courses typically include:

    • Statics and Dynamics
    • Fluid Mechanics
    • Structural Analysis
    • Materials Science
    • Engineering Design

    Most civil engineering programs offer specializations like:

    • Structural Engineering – Design of buildings, bridges, and other structures
    • Environmental Engineering – Focus on water treatment, pollution control, and waste management
    • Geotechnical Engineering – Study of soil behavior and foundation design
    • Transportation Engineering – Planning and design of transportation systems
    • Water Resources Engineering – Management of water supply and flood control systems

    When choosing a program, look for ABET accreditation (in the US) which ensures the program meets quality standards employers recognize. I’ve been on hiring committees where we immediately set aside applications from non-accredited programs—it really does matter that much in our industry.

    Graduate Opportunities

    A master’s degree or PhD isn’t always necessary but can be beneficial if:

    • You want to specialize in a specific area
    • You’re interested in research or academia
    • You’re aiming for senior management positions

    Popular research areas today include sustainable infrastructure, resilient design for climate change, and advanced materials like self-healing concrete.

    Key Takeaway: Start with a strong foundation in math and science. Pursue an ABET-accredited undergraduate program in civil engineering, and consider graduate studies only if you want to specialize, pursue research, or aim for leadership positions.

    Step 2: Building Your Civil Engineering Toolkit: Essential Skills

    Success in civil engineering requires more than just technical knowledge. You’ll need a combination of hard and soft skills to thrive in this field.

    Technical Skills

    • CAD Software – Proficiency in AutoCAD, Civil 3D, and other design software is non-negotiable. I recommend starting with free student versions or tutorials on YouTube to build familiarity. When I first learned AutoCAD, I spent countless weekends designing fictional projects just to get comfortable with the interface—time well spent!
    • Mathematics & Engineering Principles – Strong calculation skills and understanding of physics principles form the bedrock of your expertise.
    • Design Principles – Knowledge of building codes, regulations, and design standards is essential for creating safe structures.
    • Technical Drawing – Despite advances in computer modeling, the ability to sketch and interpret drawings remains valuable.

    Soft Skills

    These are often overlooked but just as important:

    • Communication – You’ll need to explain complex concepts to clients, contractors, and the public. Writing clear reports and making presentations are regular parts of the job. I once saw a brilliant engineer passed over for promotion because he couldn’t effectively communicate his ideas to non-technical stakeholders.
    • Teamwork – Civil engineering projects involve collaboration with architects, contractors, environmental scientists, and more.
    • Problem-Solving – Every project presents unique challenges that require creative solutions.
    • Project Management – Understanding timelines, budgets, and resource allocation will become increasingly important as you advance.

    Emerging Tech Skills

    The field is constantly evolving, and these skills will give you an edge:

    • Sustainability Knowledge – Understanding green building practices, LEED certification, and environmental impact assessment.
    • Building Information Modeling (BIM) – 3D modeling that incorporates time, cost, and lifecycle information.
    • Data Analysis – Basic understanding of how to analyze large datasets to inform design decisions.
    • Drone Technology – Being able to use drones for surveying and inspection is increasingly valuable.
    Key Takeaway: Balance technical engineering skills with soft skills like communication and teamwork. Stay current with emerging technologies like BIM and sustainability practices to remain competitive in the job market.

    Step 3: Gaining Real-World Civil Engineering Experience

    Theory is important, but nothing beats hands-on experience. During my time in product and client-facing roles, I’ve seen how practical experience transforms a good engineer into a great one.

    Importance of Internships/Co-op Programs

    Internships provide:

    • Practical Application – A chance to apply classroom knowledge to actual projects
    • Industry Exposure – Understanding how engineering firms operate day-to-day
    • Professional Connections – Building relationships with potential employers
    • Resume Building – Adding relevant experience that makes you stand out

    For me, seeing how engineering principles translated to real-world applications was eye-opening. I’ll never forget my first site visit during my internship at a construction firm in 2016. Watching contractors interpret drawings I’d helped create made me realize the gap between textbook problems and actual project challenges can be significant!

    Finding Opportunities

    • University Career Services – Most engineering schools have partnerships with firms that regularly hire interns
    • Professional Organizations – Groups like ASCE (American Society of Civil Engineers) often share internship openings
    • Online Job Boards – Sites like Indeed, LinkedIn, and EngineerJobs list opportunities
    • Networking Events – Attend career fairs and industry conferences

    When applying, tailor your resume to highlight relevant coursework and projects. For civil engineering internships, emphasize any design projects, fieldwork, or technical skills that match the job description.

    Entry-Level Positions

    As a junior engineer, expect to:

    • Assist with drafting and design work
    • Conduct site inspections and collect field data
    • Perform calculations and analysis under supervision
    • Help prepare reports and documentation

    To excel, be proactive about seeking feedback, asking questions when needed, and volunteering for new challenges. I’ve found that entry-level engineers who show initiative get more interesting assignments and advance faster. A colleague of mine started by volunteering to coordinate site visits nobody else wanted to do—within a year, she was managing her own small projects because she demonstrated such strong organizational skills.

    Overcoming Common Challenges

    New civil engineers often struggle with:

    • The Theory-Practice Gap – What works on paper doesn’t always work in the field. Solution: Ask experienced colleagues to explain why things are done differently in practice.
    • Communication with Contractors – Learning to speak their language takes time. Solution: Visit construction sites frequently and build relationships with project managers.
    • Software Proficiency – Firms often use specialized software not taught in school. Solution: Take advantage of online tutorials and training offered by employers.
    Key Takeaway: Practical experience through internships is crucial for bridging the gap between academic knowledge and professional practice. Actively seek opportunities through university connections, professional organizations, and networking events.

    Step 4: Civil Engineering Licensing and Certification

    In civil engineering, licensing isn’t just an option—it’s often a legal requirement to practice independently.

    Fundamentals of Engineering (FE) Exam

    This is your first step toward licensure:

    • Timing: Most take this exam during their final year of college or shortly after graduation
    • Format: 6-hour computer-based test covering math, engineering sciences, ethics, and civil engineering topics
    • Preparation: Use the NCEES FE Reference Handbook and practice exams (available on the NCEES website)

    After passing, you’ll be an Engineer in Training (EIT) or Engineering Intern (EI), depending on your state.

    Professional Engineer (PE) Exam

    This comes after gaining experience:

    • Requirements: Usually 4 years of professional experience under a licensed PE, plus passing the FE exam
    • Format: 8-hour exam focused on your specific discipline within civil engineering
    • Benefits: As a PE, you can sign and seal engineering documents, own an engineering firm, and take on higher levels of responsibility

    When I worked with civil engineers in product development, I noticed that PEs commanded more respect and had greater career mobility than their non-licensed peers. In one memorable meeting, a client dismissed a competitor’s design proposals because they weren’t presented by a licensed PE—a stark reminder of how much that credential matters in our industry.

    State-Specific Licensure

    In the US, engineering licensure is regulated by state boards, and requirements vary:

    • Some states have specific education requirements
    • Continuing education may be required to maintain your license
    • Reciprocity agreements allow engineers to practice across state lines

    International licensure systems differ. For example:

    • The UK has the Chartered Engineer (CEng) designation through institutions like ICE
    • Canada uses a similar Professional Engineer (P.Eng.) system
    • Australia has the National Engineering Register (NER)
    Key Takeaway: Plan your licensing journey early. Take the FE exam near graduation, gain qualifying experience, then pursue PE licensure. This opens doors to higher-level positions, greater responsibility, and often higher pay.

    Step 5: Civil Engineering Career Paths and Prospects

    Civil engineering offers diverse career paths, each with its own challenges and rewards.

    Diverse Roles within Civil Engineering

    • Structural Engineer: Designs buildings, bridges, and other structures to ensure safety and stability. The new One World Trade Center in New York showcases structural engineering excellence.
    • Environmental Engineer: Works on water treatment systems, waste management, and sustainability projects. Engineers at the DC Water Blue Plains facility developed innovative biosolid treatment processes that generate energy.
    • Geotechnical Engineer: Analyzes soil and rock mechanics for foundation design. The foundation work for the Burj Khalifa in Dubai required groundbreaking geotechnical solutions.
    • Transportation Engineer: Plans highways, public transit systems, and traffic management. The Interchange project in Minneapolis demonstrates creative solutions to complex traffic challenges.
    • Water Resources Engineer: Designs systems for water supply, flood control, and irrigation. The massive flood protection systems in New Orleans showcase this specialty.

    Industry Sectors

    Civil engineers work across various sectors:

    • Government Agencies (federal, state, local) – Stable employment with public infrastructure projects
    • Private Consulting Firms – Diverse projects and often higher pay
    • Construction Companies – Hands-on involvement with project execution
    • Academic Institutions – Research and teaching opportunities
    • Nonprofit Organizations – Infrastructure development in underserved communities

    Current Trends and Growth Areas

    The field is evolving with exciting new focus areas:

    • Sustainable Infrastructure – Green building practices, LEED certification, and eco-friendly materials
    • Resilient Design – Creating infrastructure that can withstand climate change impacts
    • Smart Cities – Integrating technology into urban planning and infrastructure
    • Infrastructure Rehabilitation – Upgrading aging bridges, roads, and utility systems

    According to the Bureau of Labor Statistics, civil engineering jobs are projected to grow 8% through 2026, creating approximately 32,500 new positions.

    Innovative Civil Engineering Projects

    Some remarkable projects that showcase what’s possible in modern civil engineering:

    • The Millau Viaduct (France) – The world’s tallest bridge uses innovative cable-stay technology and minimal materials for maximum strength.
    • The High Line (New York) – A brilliant example of adaptive reuse, converting an abandoned railway into vibrant public space.
    • Bosco Verticale (Milan) – These residential towers incorporate over 900 trees, creating “vertical forests” that improve air quality and biodiversity in urban settings.
    Key Takeaway: Civil engineering offers diverse career paths across multiple sectors with strong growth potential. The most exciting opportunities lie in sustainable infrastructure, resilient design, and smart city development.

    Step 6: Civil Engineering Salary & Job Market

    Let’s talk about a practical concern for any career path: compensation.

    Current Salary Trends

    Civil engineering offers competitive salaries that vary by experience, specialization, and location:

    Experience Level Typical Salary Range (USD)
    Entry-Level (0-2 years) $55,000 – $70,000
    Mid-Level (3-10 years) $70,000 – $95,000
    Senior (10+ years) $95,000 – $130,000+
    Project Manager/Director $120,000 – $170,000+

    Location significantly impacts salary:

    • Urban Areas (New York, San Francisco, Boston): 15-30% higher than national averages
    • Rural Areas: Often 10-20% lower than national averages
    • International Opportunities: Vary widely, with positions in the Middle East and Australia often offering premium packages

    Specializations like structural engineering for high-rise buildings or offshore structures typically command higher salaries. I had a classmate who specialized in earthquake-resistant design who now earns about 25% more than peers who pursued more general civil engineering paths.

    Regional Civil Engineering Job Markets

    Some regions offer particularly strong opportunities for civil engineers:

    • Texas – Rapid urban growth in Austin, Dallas, and Houston is creating high demand for transportation and water infrastructure engineers
    • California – Climate resilience projects and seismic retrofitting create specialized opportunities
    • Florida – Sea level rise mitigation and storm-resistant infrastructure needs are growing
    • Washington – Growing tech sector is driving urban development and infrastructure upgrades

    Job Market Outlook

    The job market for civil engineers remains strong due to:

    • Infrastructure Investment: Government funding for rebuilding roads, bridges, and utilities
    • Urban Development: Growing cities require expanded infrastructure
    • Sustainability Initiatives: Green building and renewable energy projects
    • Climate Resilience: Increasing need for infrastructure that can withstand extreme weather events

    According to industry reports, areas with particularly high demand include:

    • Water resource management
    • Transportation systems
    • Renewable energy infrastructure
    • Urban redevelopment

    PE licensure can increase your salary by approximately 5-15% and opens doors to higher-level positions that require professional certification.

    Key Takeaway: Civil engineering offers stable, well-paying careers with entry-level salaries ranging from $55,000-$70,000 and significant growth potential. The strongest job prospects are in urban development, infrastructure rehabilitation, and sustainability-focused projects.

    Step 7: Your Civil Engineering Future

    You now have a roadmap for launching your civil engineering career. Let’s recap the essential steps:

    1. Build a strong educational foundation with an accredited degree
    2. Develop both technical and soft skills needed for success
    3. Gain hands-on experience through internships and entry-level positions
    4. Pursue professional licensing and certifications
    5. Explore diverse career paths within civil engineering
    6. Research salary expectations and job market trends
    7. Continue learning and adapting to new technologies and practices

    Civil engineering isn’t just a career—it’s a chance to leave a lasting legacy. The bridges, buildings, and systems you design could serve communities for generations. When I visit cities like Chicago or New York, I’m always struck by how civil engineers from 100+ years ago shaped the urban environment we still use today. As infrastructure needs grow and environmental challenges mount, skilled civil engineers will be in increasingly high demand.

    Ready to build your future in civil engineering? I’ve helped dozens of engineering graduates land their first jobs, and it always starts with a standout resume. Create a professional resume that highlights your education, technical skills, and project experience—even student projects count when you’re just starting out!

    Create your engineering resume today

    FAQ: Common Questions About Civil Engineering Careers

    What qualifications do you need for civil engineering?

    At minimum, you need a bachelor’s degree in civil engineering or a related field from an ABET-accredited program (in the US). For advancement and independent practice, you’ll need to pass the FE exam, gain experience, and eventually obtain PE licensure. Strong math and science skills are essential, along with problem-solving abilities and attention to detail.

    What are the career options?

    Civil engineering offers diverse career paths including structural engineering (buildings, bridges), environmental engineering (water treatment, pollution control), transportation engineering (highways, transit systems), geotechnical engineering (foundations, soil mechanics), and water resources engineering (dams, flood control). You can work for government agencies, private consulting firms, construction companies, or academic institutions.

    Is civil engineering a good career choice?

    Yes! Civil engineering offers job stability, competitive salaries, and meaningful work that directly impacts communities. The field consistently shows positive growth projections, and civil engineers often report high job satisfaction. Plus, the skills are transferable globally, opening doors to international opportunities.

    What is the difference between civil engineering and architecture?

    While both professions contribute to building projects, their focus differs. Architects concentrate on the aesthetic design, spatial functionality, and user experience of buildings. Civil engineers focus on the technical aspects—ensuring structures are safe, stable, and efficiently built. They handle structural calculations, material specifications, and compliance with building codes. Simply put: architects determine how a building looks and functions for users; civil engineers make sure it stands up and remains safe.

    How can I prepare for the FE exam?

    Start by understanding the exam format and content through the NCEES website. Use the official NCEES Reference Handbook, which contains all formulas and information available during the exam. Take practice exams to familiarize yourself with the question style and time constraints. Many students find study groups or prep courses helpful. Begin studying 2-3 months before your exam date, focusing on areas where you feel less confident.

    About the Author

    Daniyaal graduated from Jadavpur University with a degree in engineering and has spent over 8 years working with engineering teams across multinational companies. He has helped dozens of engineering graduates navigate their early careers and specializes in bridging the gap between academic knowledge and industry practice. His experience spans product development, client engagement, and technical consulting for engineering firms.

  • Project Planning Mastery: 7 Essential Steps for Civil Engineers

    Project Planning Mastery: 7 Essential Steps for Civil Engineers

    I remember my first day at a construction site as a fresh graduate. The project manager handed me a thick folder of plans and said, “Make sure we stay on track.” No guidance, no templates, just sink or swim. That day taught me the hard truth about project planning in civil engineering – without a solid framework, even the most brilliant designs can fail spectacularly.

    Project planning in civil engineering isn’t just about creating fancy charts or impressive presentations. It’s the backbone that supports every successful infrastructure project, from small residential developments to massive highway systems. Whether you’re a recent graduate or a seasoned professional looking to refine your approach, mastering these essential planning steps will set you apart in the industry.

    In this guide, I’ll walk you through the seven critical steps that have consistently delivered results in my experience working across multiple engineering projects. These aren’t theoretical concepts from textbooks – they’re practical strategies I’ve refined through both successes and failures in the field.

    The Quick Takeaway: Civil Engineering Project Planning in a Nutshell

    Short on time? Here’s what you need to know about effective project planning in civil engineering:

    • Planning isn’t just paperwork—it’s your blueprint for success that prevents costly mistakes
    • The 7 essential steps: scope definition, budgeting, scheduling, risk management, quality control, communication, and monitoring
    • Real success comes from adapting these principles to your specific project needs
    • Digital tools like BIM can cut project times by 30% when implemented properly
    • Your communication skills often matter more than your technical expertise

    Want the full details? Keep reading for my battle-tested strategies and real-world examples.

    What is Civil Engineering Project Planning and Why Does It Matter?

    Defining Project Planning in Civil Engineering

    In my experience, project planning in civil engineering boils down to answering some critical questions: What are we building? How will we build it? When will we finish each part? And who’s doing what? It’s about creating a roadmap that keeps everyone on the same page.

    Unlike planning for a software product or marketing campaign, civil engineering planning deals with physical constraints, natural environments, and public safety considerations that simply can’t be compromised.

    The answers to these questions form the roadmap that guides every decision throughout the project lifecycle.

    Key Benefits of Thorough Planning in Civil Engineering

    I’ve seen projects both succeed brilliantly and fail miserably, and the difference almost always comes down to planning quality. Here’s why planning matters:

    • Cost Control: Proper planning helps identify and manage expenses before they spiral out of control. On a bridge project I worked on, preliminary planning identified potential foundation issues that, if discovered during construction, would have increased costs by 22%.
    • Risk Reduction: Identifying potential problems early allows for proactive solutions rather than reactive fixes. I once saved a highway project three weeks of delays by planning for alternative material suppliers when our risk assessment flagged potential supply chain issues.
    • Regulatory Compliance: Planning ensures all necessary permits and approvals are obtained on schedule. I’ve seen projects grind to a halt because someone forgot to factor in the 45-day review period for environmental permits.
    • Stakeholder Satisfaction: Clear planning sets realistic expectations for clients, communities, and team members. When everyone knows what’s happening and when, you avoid the dreaded “I thought this would be done by now” conversations.

    The Interdisciplinary Nature of Civil Engineering Planning

    Civil engineering planning doesn’t happen in isolation. It requires collaboration across disciplines:

    • Architects provide design vision
    • Environmental scientists assess ecological impact
    • Geotechnical engineers analyze soil conditions
    • Structural engineers determine load requirements
    • Mechanical and electrical engineers plan building systems

    As the civil engineer, you often serve as the central coordinator of these diverse perspectives. During a commercial development project I led last year, I found myself translating between the architect’s aesthetic vision and the structural engineer’s practical concerns almost daily. Your ability to bridge these different perspectives can make or break a project.

    Key Takeaway: Project planning in civil engineering is not just paperwork—it’s a strategic process that prevents costly mistakes, ensures regulatory compliance, and coordinates multiple disciplines toward a common goal. The time invested in planning pays dividends throughout the project lifecycle.

    7 Steps to Flawless Project Execution

    Step 1: Project Initiation and Scope Definition

    The foundation of any successful civil engineering project is a crystal-clear scope definition. Without it, you’re essentially building on quicksand.

    Start by documenting:

    • Project objectives and deliverables
    • Physical boundaries and limitations
    • Quality standards and specifications
    • Exclusions (what the project will NOT include)

    During my work on a municipal water treatment facility, our initial scope failed to clearly define the boundaries between our work and the electrical contractor’s responsibilities. This oversight led to three weeks of delays and heated debates about who was responsible for power supply connections. We were both saying, “That’s not my job” while the client was saying, “I don’t care whose job it is, just get it done!”

    The scope definition process should include:

    1. Interviewing key stakeholders to understand their expectations
    2. Reviewing similar projects for reference points
    3. Documenting assumptions and constraints
    4. Creating a formal scope statement that all parties approve

    A well-defined scope serves as your project’s constitution—the document you return to whenever questions or disputes arise.

    My Tip: Create a one-page scope summary with visual boundaries marked on a site plan. I’ve found this simple tool prevents most scope disputes because everyone has the same mental picture of what we’re building.

    Key Takeaway: A detailed project scope is your best defense against scope creep and miscommunications. Take time to document not just what will be done, but also what won’t be included in the project. Get formal sign-off from all stakeholders before proceeding.

    Step 2: Budgeting and Cost Estimation

    Civil engineering projects can quickly derail financially without thorough budgeting. I’ve found that effective cost estimation requires a combination of methods:

    Bottom-up Estimating: Break down each project component and estimate individual costs. This works well for standard elements like concrete volume or earthwork. When I’m planning a foundation, I’ll calculate exact quantities of concrete, rebar, formwork, labor hours, and equipment time needed.

    Parametric Estimating: Use mathematical models based on known variables. For example, estimating bridge costs based on span length and type. I keep a spreadsheet that can quickly give me a rough cost for different structure types based on key parameters.

    Analogous Estimating: Reference similar completed projects and adjust for differences. I keep a database of past projects specifically for this purpose. Last year, when pricing a new parking structure, I referred back to three similar projects we’d completed in the last five years, adjusting for inflation and site conditions.

    A comprehensive budget should include:

    • Direct costs (materials, labor, equipment)
    • Indirect costs (permits, design fees, insurance)
    • Contingency funds (typically 5-15% depending on project complexity)
    • Escalation costs for multi-year projects

    One technique that saved a highway project I worked on: creating three distinct estimates—optimistic, most likely, and pessimistic. This three-point estimation helped us identify where we needed more detailed information and where our assumptions might be weak.

    Always remember to update your budget as the project progresses. Static budgets quickly become obsolete as conditions change.

    Step 3: Scheduling and Resource Allocation

    A realistic schedule is perhaps the most visible component of your project plan. Creating an effective schedule involves:

    1. Breaking the project into discrete work packages
    2. Determining dependencies between activities
    3. Estimating durations based on resource availability
    4. Identifying the critical path that determines project duration

    I use a combination of tools for scheduling:

    • Gantt charts for visual timelines
    • Critical Path Method (CPM) to identify schedule drivers
    • Resource histograms to prevent overallocation

    For a residential development project I managed, we created a detailed resource-loaded schedule that showed exactly when we would need specific heavy equipment. This allowed us to negotiate better rates with equipment providers by guaranteeing longer rental periods with specific start and end dates. We saved almost $30,000 on excavator rentals alone by planning this way.

    Common scheduling mistakes to avoid:

    • Failing to account for weather conditions (I always build in rain days during spring seasons)
    • Overlooking procurement lead times (especially critical now with ongoing supply chain issues)
    • Scheduling too many activities in parallel without sufficient resources
    • Not building in float time for critical activities

    For effective resource allocation, I maintain a master resource calendar that shows the availability of key personnel, equipment, and materials across all projects. This prevents the common problem of accidentally double-booking critical resources.

    Step 4: Risk Management and Mitigation

    Every civil engineering project faces risks, but the successful ones have comprehensive strategies to address them.

    When I manage risk on my projects, I start with a team brainstorming session. We grab a whiteboard and ask, “What could possibly go wrong?” Drawing from our past projects, we create a checklist of potential issues specific to this project.

    The risk management process includes:

    1. Risk Identification: On a recent highway project, we identified 37 distinct risks ranging from groundwater issues to material delivery delays. I like to categorize risks by project phase to make sure we’re looking at the complete picture.
    2. Risk Analysis: I use a simple 1-5 scale for both probability and impact, then multiply them to get a risk score. Anything above 15 gets special attention. It’s not fancy, but it works.
    3. Risk Response Planning: Develop specific strategies for high-priority risks:
      • Avoid: Change plans to eliminate the threat
      • Mitigate: Reduce probability or impact
      • Transfer: Shift risk to another party (insurance, contracts)
      • Accept: Acknowledge and monitor low-priority risks
    4. Risk Monitoring: Continuously track identified risks and scan for new ones throughout the project lifecycle.

    Common civil engineering risks I’ve encountered include:

    • Geotechnical surprises (unexpected soil conditions)
    • Weather events disrupting construction
    • Material price fluctuations
    • Regulatory compliance issues
    • Public opposition or stakeholder conflicts

    For each high-priority risk, assign an owner responsible for monitoring and implementing response strategies. I find that when someone’s name is attached to a risk, it actually gets managed rather than ignored.

    Step 5: Quality Control and Assurance

    Quality failures in civil engineering can have catastrophic consequences. A structured approach to quality management includes:

    Quality Planning: Define quality standards and how they’ll be measured. For example, concrete compressive strength requirements, surface finish specifications, or alignment tolerances.

    Quality Assurance: Proactive processes to prevent defects, including:

    • Material testing and certification
    • Contractor prequalification
    • Training requirements for workers
    • Regular quality audits

    Quality Control: Verification activities to identify defects, such as:

    • Inspection points at critical stages
    • Testing procedures and frequencies
    • Documentation requirements
    • Non-conformance protocols

    On a bridge rehabilitation project I supervised, we implemented a three-tier quality system with daily inspections by the contractor, weekly reviews by our field engineers, and monthly independent assessments. This layered approach caught several potential issues before they became expensive problems.

    I remember one instance where our field engineer noticed slight discoloration in a concrete delivery. Testing confirmed the mix was out of specification, and we rejected the entire load before it was placed. That attention to quality saved us from having to demolish and replace a pier cap, which would have set the project back by weeks.

    Document every quality check in a centralized system. Well-maintained quality records not only demonstrate compliance but provide valuable data for improving future projects.

    Step 6: Communication and Collaboration

    Poor communication derails more civil engineering projects than technical problems do. An effective communication plan addresses:

    Who: Identify all stakeholders who need information:

    • Project team members
    • Client representatives
    • Regulatory authorities
    • Community members
    • Subcontractors and suppliers

    What: Define what information each stakeholder needs:

    • Technical specifications
    • Schedule updates
    • Budget reports
    • Risk alerts
    • Quality issues

    When: Establish communication frequency:

    • Daily toolbox talks for field teams
    • Weekly progress meetings with key team members
    • Monthly client updates
    • Quarterly public information sessions

    How: Select appropriate communication methods:

    • Face-to-face meetings for complex discussions
    • Email for documentation
    • Project management software for tracking
    • Public websites for community information

    I’ve found that creating a simple communication matrix that maps stakeholders to information needs and frequency dramatically improves project transparency. On my projects, everyone knows exactly what information they’ll receive and when they’ll receive it.

    For a municipal project I managed, we established a dedicated public information center with regular updates, which turned potential opposition into community support by keeping everyone informed. We even created a simple website where residents could see weekly progress photos and upcoming construction activities that might affect their commutes.

    Step 7: Monitoring, Control, and Project Closure

    Even my most detailed plans need regular check-ups. On my last highway project, we set up weekly progress meetings where we compared our actual work against our plan. We used simple metrics like comparing percentage complete against percentage of budget spent to quickly spot potential issues.

    Effective project control includes:

    Performance Tracking: Measure actual progress against the plan using:

    • Earned Value Management (EVM) metrics
    • Schedule performance index (SPI)
    • Cost performance index (CPI)
    • Quality metrics and non-conformance reports

    Change Management: Establish a formal process for handling inevitable changes:

    • Change request documentation
    • Impact analysis procedures
    • Approval requirements
    • Implementation protocols

    Project Closure: Properly concluding a project is often overlooked but critical:

    • Final inspections and approvals
    • Documentation archiving
    • Lessons learned sessions
    • Client acceptance formalization

    One practice I’ve found invaluable is holding a structured lessons learned session at project completion. By documenting what went well and what could improve, each project makes our team stronger for the next one. We don’t just celebrate completion—we celebrate what we’ve learned.

    On my last major project, we identified five process improvements during our closure review that we’ve now implemented as standard practices across all new projects. One simple change—requiring geotechnical reviews at 30% design instead of 60%—has already prevented costly redesign work on two subsequent projects.

    You can learn more about effective project monitoring techniques in our video lectures designed specifically for engineering students.

    Key Takeaway: Consistent monitoring and control processes help you identify and address issues early when they’re still manageable. Establish clear metrics for measuring progress, implement a formal change management system, and always conduct a thorough project closure review to capture lessons learned.

    Common Beginner Mistakes in Project Planning

    In my 15+ years in civil engineering, I’ve seen new engineers make the same planning mistakes repeatedly:

    Overly Optimistic Scheduling

    New engineers often create schedules based on perfect conditions. I made this mistake early in my career, assuming every activity would finish exactly as planned. Now I follow what I call the “multiply-by-1.5 rule”—whatever duration feels right for an activity, I multiply it by 1.5 for activities with high uncertainty.

    Underestimating Site Challenges

    Don’t assume site conditions match exactly what’s in the geotechnical report. On my second project, we discovered an unmarked utility line that wasn’t on any as-built drawings. Now I always budget time and money for unexpected site conditions.

    Neglecting Stakeholder Input

    Many young engineers create plans in isolation, focusing only on technical aspects. I’ve learned that involving key stakeholders—especially future maintenance teams—improves both the plan and everyone’s commitment to it.

    Forgetting Weather Impacts

    Weather can derail even the best plans. I now research historical weather patterns for the project duration and location, then build in appropriate contingencies for seasonal challenges.

    The Future of Civil Engineering Planning

    Integrating Sustainable Practices in Project Planning

    Sustainability is no longer optional in civil engineering—it’s a fundamental consideration that should be integrated throughout the planning process.

    Best practices for sustainable planning include:

    Life Cycle Assessment: Evaluate environmental impacts across the entire project lifespan, from material extraction through construction, operation, and eventual demolition.

    Green Material Specification: Incorporate recycled content, locally sourced materials, and low-embodied carbon options where possible. On my projects, I’ve started requiring concrete with supplementary cementitious materials that reduce our carbon footprint while maintaining performance.

    Energy Efficiency Planning: Design for reduced energy consumption during both construction and operation phases. This includes planning construction site layouts to minimize equipment travel and idle time.

    Water Conservation Strategies: Implement stormwater management, water reuse systems, and efficient fixtures.

    For a recent commercial development, we reduced the project’s carbon footprint by 27% through careful material selection and innovative design approaches identified during the planning phase. Simply changing our asphalt specification to include recycled material diverted over 2,000 tons of waste from landfills.

    Certification systems like LEED, Envision, and BREEAM provide structured frameworks for implementing sustainable practices. According to the U.S. Green Building Council, LEED-certified buildings consume 25% less energy and 11% less water compared to conventional buildings.

    Utilizing Technology and Tools for Efficient Planning

    The digital transformation of civil engineering has revolutionized project planning capabilities:

    Building Information Modeling (BIM): Beyond 3D modeling, BIM enables:

    • Clash detection to identify conflicts before construction
    • 4D scheduling that links model elements to timeline
    • 5D cost estimation that connects design decisions to budget impact
    • Virtual reality walkthroughs for stakeholder review

    On my latest water treatment plant project, our BIM model identified 47 pipe conflicts before construction began. Fixing these issues virtually saved us an estimated $180,000 in field rework costs.

    Project Management Software: Tools like Procore, Primavera P6, and Microsoft Project provide:

    • Real-time progress tracking
    • Resource management
    • Document control
    • Team collaboration features

    Data Analytics: Advanced analytics offer:

    • Predictive modeling for risk assessment
    • Performance benchmarking against similar projects
    • Pattern recognition for identifying potential issues

    Mobile Solutions: Field applications enable:

    • Real-time data collection
    • Immediate issue reporting
    • Drawing and document access onsite
    • Photo documentation linked to location data

    According to McKinsey & Company, construction projects that implement appropriate digital tools can reduce project completion times by up to 30% and cut costs by up to 45%.

    I’ve found that the key is not adopting technology for its own sake, but strategically implementing tools that address specific planning challenges within your organization. When we first adopted BIM, we focused solely on using it for clash detection, mastering that capability before moving on to 4D scheduling integration.

    Learning from Success: Civil Engineering Planning Case Studies

    Case Study 1: Urban Bridge Replacement Project

    A 70-year-old bridge in a densely populated area needed replacement while maintaining traffic flow. The planning challenges included:

    • Limited workspace
    • High traffic volumes
    • Nearby historic structures
    • Multiple utility relocations

    Planning Strategy: The team implemented a phased construction approach with temporary structures to maintain traffic flow. They used 4D BIM modeling to visualize each construction stage and identify potential conflicts.

    Results: The project was completed two months ahead of schedule with minimal traffic disruption. The detailed planning allowed for precise scheduling of lane closures during off-peak hours, reducing community impact.

    Key Lesson: Investing in advanced modeling during planning paid for itself many times over by preventing costly surprises during construction.

    Case Study 2: Rural Water Supply System

    A small community needed a comprehensive water supply system including wells, treatment facilities, and distribution networks across challenging terrain.

    Planning Strategy: The team divided the project into independent work packages that could proceed simultaneously. They implemented a risk-based approach that prioritized geotechnical investigations in areas with uncertain conditions.

    Results: Despite discovering unexpected rock formations that required plan modifications, the project finished within 5% of the original budget due to the contingency planning and flexible work package approach.

    Key Lesson: Creating independent work packages with their own resource allocation plans allows for greater flexibility when conditions change.

    Your Project Planning Questions Answered

    How do you plan a construction project?

    Planning a construction project follows these essential steps:

    1. Define project scope with clear deliverables and boundaries
    2. Create detailed cost estimates and budgets
    3. Develop comprehensive schedules with resource allocations
    4. Implement risk management strategies
    5. Establish quality control procedures
    6. Create communication protocols
    7. Set up monitoring and control systems

    The key is making each step specific to your project’s unique requirements rather than using generic templates. On my reservoir expansion project, we modified our standard quality control procedures to include additional testing specifically for the specialized liner material we were using.

    What are the essential components of a project plan?

    A complete civil engineering project plan includes:

    • Scope statement with clear objectives
    • Work breakdown structure (WBS)
    • Budget with cost estimates
    • Project schedule with dependencies
    • Resource allocation plan
    • Risk register and response strategies
    • Quality management approach
    • Communication plan
    • Procurement requirements

    These components should be living documents that evolve as the project progresses. I typically review and update our risk register every two weeks throughout the project lifecycle.

    What project management software is best for civil engineers?

    The best software depends on your specific needs, but popular options include:

    • Primavera P6: Excellent for complex, large-scale projects with sophisticated scheduling needs. This is my go-to for projects over $10 million.
    • Microsoft Project: Good balance of functionality and accessibility for medium-sized projects. Great if you need to share schedules with clients who may not have specialized software.
    • Procore: Strong field management capabilities with mobile integration. We’ve found this particularly useful for projects with multiple subcontractors.
    • Autodesk Construction Cloud: Seamless integration with BIM and design tools. Invaluable if you’re already using Revit or Civil 3D.

    I recommend evaluating options based on your team’s specific workflow, existing systems, and the complexity of your typical projects. Don’t just choose what’s popular—choose what solves your particular planning challenges.

    How can I ensure my project is sustainable?

    To enhance project sustainability:

    1. Conduct environmental impact assessments early in planning
    2. Set specific sustainability goals and metrics
    3. Prioritize locally sourced materials to reduce transportation impacts
    4. Incorporate renewable energy systems where feasible
    5. Design for future adaptability and resilience
    6. Implement construction waste management plans
    7. Consider lifecycle costs rather than just initial construction costs

    Sustainability considerations should be integrated into every planning decision rather than treated as an add-on. On my last project, we evaluated every major material choice using a simple sustainability scorecard that considered embodied carbon, recyclability, and local sourcing.

    How Project Planning Skills Boost Your Engineering Career

    The planning skills you develop as a civil engineer can open doors beyond traditional project roles. In my career, I’ve seen colleagues leverage these skills to move into:

    • Construction Management: Where detailed planning expertise is directly applicable
    • Risk Management: Using analytical skills to identify and mitigate organizational risks
    • Consulting: Helping organizations implement planning best practices
    • Sustainability Coordination: Leading sustainable design and planning initiatives

    My own planning experience helped me secure a role leading our company’s BIM implementation initiative, which expanded my career in directions I hadn’t anticipated.

    Strong planning skills make you valuable regardless of economic conditions—when times are good, you help maximize efficiency on growing projects; when times are tight, you help optimize resources on limited budgets.

    Conclusion

    Project planning in civil engineering is both an art and a science. The seven steps outlined here provide a framework that can be adapted to projects of any scale or complexity:

    1. Project Initiation and Scope Definition
    2. Budgeting and Cost Estimation
    3. Scheduling and Resource Allocation
    4. Risk Management and Mitigation
    5. Quality Control and Assurance
    6. Communication and Collaboration
    7. Monitoring, Control, and Project Closure

    What separates exceptional civil engineers from average ones isn’t just technical knowledge—it’s the ability to plan effectively, anticipate challenges, and organize resources to deliver successful projects.

    I’ve learned something new from every project I’ve managed—from my first bridge renovation to my most recent highway expansion. You will too. Each project is a chance to refine your planning process and become a more valuable engineer.

    Whether you’re working on your first project or your fiftieth, continuous improvement in your planning approach will yield better results. I encourage you to develop your own templates and checklists based on these principles, tailored to your specific practice areas.

    Want to stand out in your next job interview? Check out our interview preparation resources where you’ll find specific questions about project planning that employers often ask civil engineers. And while you’re building your career toolkit, our Resume Builder can help you highlight your planning skills effectively.

    Remember that great civil engineers don’t just build structures—they build better communities through thoughtful, responsible planning.

  • Top 7 Project Management Tools Revolutionizing Civil Engineering

    Top 7 Project Management Tools Revolutionizing Civil Engineering

    Have you ever wondered why civil engineering projects so often go over budget or miss deadlines? I certainly did during my first year after graduating from Jadavpur University, when I watched a simple bridge repair project spiral into a six-month delay nightmare. A shocking 85% of large construction projects exceed their budgets and timelines, according to McKinsey research.

    Project management tools are revolutionizing how civil engineers plan, execute, and monitor projects. From coordinating dispersed teams to managing complex workflows and ensuring regulatory compliance, the right project management software can be the difference between project success and failure.

    In this guide, I’ll share my experiences with the top project management tools specifically designed for civil engineers. I’ve tested dozens of these platforms during my time working with various product-based and client-based multinational companies, and I’ve seen firsthand how the right tool can transform project outcomes.

    Why Generic PM Software Isn’t Enough for Civil Engineering

    When I first started managing civil engineering projects, I tried using general project management tools that worked well in other industries. Big mistake! I quickly discovered that civil engineering has unique demands that generic software simply can’t handle.

    Civil engineering projects face specific challenges:

    • Complex, multi-stage project lifecycles spanning years
    • Strict regulatory compliance with standards like AASHTO, ASTM, and environmental regulations
    • Geographically dispersed teams (field crews, office staff, contractors)
    • Need for integration with specialized engineering software (CAD, BIM)
    • Significant budget constraints and tight deadlines

    Using inadequate tools leads to serious consequences:

    • Increased risk of costly delays and budget overruns
    • Poor communication between field and office teams
    • Difficulty tracking progress across multiple project phases
    • Higher potential for errors requiring expensive rework

    I learned this lesson the hard way on a bridge rehabilitation project where our generic PM tool couldn’t properly link design changes to field implementation. The disconnect resulted in crews working from outdated plans for three days before anyone noticed, causing a two-week delay and nearly $30,000 in rework costs.

    The Essential Toolkit: Features that Power Civil Engineering Success

    Detailed Project Scheduling

    Robust scheduling features with Gantt charts and Critical Path Method are crucial for visualizing project timelines, identifying critical tasks, and managing dependencies. Look for tools that allow for easy “what-if” scenario planning to anticipate potential delays or resource constraints.

    Budgeting and Cost Control

    Civil engineering projects can involve millions in spending across hundreds of line items. Effective tools should offer robust budgeting features, enabling you to track expenses, manage cash flow, and monitor project profitability in real-time. The ability to quickly generate cost variance reports is essential.

    Document Management & Version Control

    Civil engineering projects generate massive amounts of documentation – from technical drawings to permit applications. A centralized document management system with version control ensures everyone works with the latest information and reduces the risk of costly errors.

    Collaboration & Communication

    Seamless communication between field crews, office staff, and subcontractors is vital. Look for tools with integrated communication features, such as instant messaging, file sharing, and task-specific discussions that can be referenced later when questions arise.

    Mobile Accessibility

    Field crews need access to project information on the go. Mobile apps that allow for real-time updates, issue reporting, and document access are essential for keeping projects moving forward, especially on remote construction sites.

    Integration with Engineering Software

    Integration with industry-standard software like AutoCAD, Revit, and GIS is critical for streamlining workflows and ensuring data accuracy. Look for tools with open APIs or direct integrations to avoid time-consuming manual data transfers.

    Reporting and Analytics

    Data-driven decision-making is key to project success. Tools should offer comprehensive reporting and analytics capabilities, allowing you to track progress, identify trends, and make informed adjustments before small issues become major problems.

    Key Takeaway: Civil engineering project management requires specialized tools that can handle complex scheduling, integrated document management, field collaboration, and engineering software integration. Generic PM tools typically fall short in these critical areas.

    Top 7 Civil Engineering Project Management Tools for 2024

    After years of testing different solutions across various projects, I’ve identified the seven tools that consistently deliver results for civil engineering teams. Each has distinct strengths that make them suitable for different project types and team sizes.

    1. Autodesk Construction Cloud

    Autodesk Construction Cloud unifies design, planning, field execution, and facility management in one comprehensive platform specifically designed for construction and engineering projects.

    Key Features for Civil Engineers:

    • Connects BIM models directly to project schedules and budgets
    • Advanced document management with version control for drawings and specs
    • Field issue tracking with photo documentation and location tagging
    • RFI and submittal management with automated workflows

    Pros:

    • Seamless integration with AutoCAD and Revit
    • Excellent mobile experience for field teams
    • Comprehensive solution covering the entire project lifecycle
    • During our highway overpass project last year, the model-based quantification saved my team 15 hours per week on takeoffs

    Cons:

    • Expensive for smaller firms
    • Can be overwhelming with its extensive feature set
    • Requires significant training for team adoption

    Pricing: $460-$1,270/user/year depending on features. Enterprise pricing available.

    Ideal Use Case: Large-scale infrastructure projects with significant BIM requirements, where tight document control and collaboration between design and construction teams are paramount.

    Learn More about Autodesk Construction Cloud

    2. Oracle Primavera P6

    Primavera P6 is the industry standard for complex scheduling and resource management, designed specifically for large-scale infrastructure and engineering projects.

    Key Features for Civil Engineers:

    • Advanced Critical Path Method scheduling
    • Detailed resource loading and leveling
    • Risk analysis and Monte Carlo simulations
    • Multi-project portfolio management

    Pros:

    • Unmatched scheduling capabilities for complex projects
    • Powerful earned value management tools
    • Extensive reporting capabilities
    • On my municipal water infrastructure project, our ability to forecast project completion improved by 35% after implementing P6

    Cons:

    • Steep learning curve – expect to invest at least two weeks in training
    • Desktop version has a dated interface
    • Limited collaboration features compared to cloud-based options

    Pricing: Approximately $2,500 per user license plus annual maintenance, or cloud subscription starting at $400/user/month.

    Ideal Use Case: Government infrastructure projects, highway construction, and any project requiring sophisticated scheduling, resource management, and earned value tracking.

    Learn More about Oracle Primavera P6

    3. Procore

    Procore is a cloud-based construction management platform that connects your team, applications, and devices in one central hub, specializing in document and field management.

    Key Features for Civil Engineers:

    • Centralized document management with version control
    • Real-time field updates and reporting
    • Intuitive drawing management with markup capabilities
    • Comprehensive quality and safety program management

    Pros:

    • Excellent mobile app for field teams
    • User-friendly interface requiring minimal training
    • Strong customer support and implementation services
    • When my team implemented Procore on our bridge rehabilitation project, we reduced our RFI response time from 5 days to less than 48 hours

    Cons:

    • Less robust scheduling features than specialized tools
    • Can become expensive with multiple modules
    • Limited BIM capabilities without add-ons

    Pricing: Typically $375-$1,200/month based on project volume and required modules.

    Ideal Use Case: Mid-sized civil engineering firms managing multiple concurrent projects who need strong document control and field reporting capabilities.

    Learn More about Procore

    4. BuilderTrend

    BuilderTrend combines project management, customer management, and financial tools in one platform, making it particularly suitable for smaller civil engineering firms.

    Key Features for Civil Engineers:

    • Daily logs and progress photos
    • Streamlined change order management
    • Client portal for improved communication
    • Built-in estimating and proposal tools

    Pros:

    • All-in-one solution for smaller teams
    • Excellent client communication features
    • Intuitive interface with minimal learning curve
    • At my previous smaller firm, our client satisfaction scores increased by 25% within three months of implementation as clients could actually see daily progress

    Cons:

    • Limited advanced scheduling capabilities
    • Not ideal for complex, large-scale projects
    • Fewer integration options with engineering software

    Pricing: Starts at $99/month for the Essential plan, with advanced features available in Performance ($399/month) and Complete ($699/month) plans.

    Ideal Use Case: Small to medium civil engineering firms focused on residential or light commercial projects who need client communication tools and basic project management features.

    Learn More about BuilderTrend

    5. Microsoft Project

    Microsoft Project is my go-to tool when working with government clients. It offers strong scheduling features and plays nicely with Excel, Teams, and other Microsoft tools that many civil engineering departments already use.

    Key Features for Civil Engineers:

    • Detailed Gantt charts and resource management
    • Integration with Microsoft 365 suite
    • Multiple project views (Gantt, Board, Timeline)
    • Extensive customization options

    Pros:

    • Familiar interface for Microsoft users
    • Strong reporting and dashboard capabilities
    • Good balance of features and usability
    • During my work with a city engineering department, the integration with Excel and Teams saved us hours in reporting and communication

    Cons:

    • Limited mobile functionality compared to construction-specific apps
    • Not construction-specific like other options
    • Document management is less robust than specialized tools

    Pricing: Microsoft Project Plan 1 starts at $10/user/month, with Plan 3 (most comprehensive) at $30/user/month.

    Ideal Use Case: Civil engineering firms already invested in the Microsoft ecosystem who need solid scheduling capabilities but don’t require construction-specific features.

    Learn More about Microsoft Project

    6. PlanGrid (Autodesk)

    PlanGrid specializes in construction drawing management and field collaboration, making it popular for infrastructure and civil engineering projects with extensive plan sets.

    Key Features for Civil Engineers:

    • Sheet management with automatic hyperlinking
    • Field markup and issue tracking
    • Photo documentation with location tagging
    • Task management and punch lists

    Pros:

    • Exceptional mobile experience even in areas with spotty connectivity
    • Very intuitive for field users
    • Excellent drawing and document management
    • I was amazed when our field teams adopted PlanGrid within days, with no formal training needed

    Cons:

    • Limited scheduling capabilities
    • Not a comprehensive project management solution
    • Now requires integration with other Autodesk products for full functionality

    Pricing: Starts at $39/user/month for core features, with advanced features at $59/user/month and up.

    Ideal Use Case: Projects with extensive plan sets and field teams who need simple, reliable access to up-to-date drawings and documents on mobile devices.

    Learn More about PlanGrid

    7. Asana

    Asana is a flexible task management and team collaboration tool that can be adapted for civil engineering project workflows, particularly for firms looking for an affordable solution.

    Key Features for Civil Engineers:

    • Customizable project workflows and boards
    • Timeline view for scheduling
    • Task dependencies and milestones
    • Team collaboration and communication tools

    Pros:

    • Clean, intuitive interface
    • Excellent for tracking action items and deadlines
    • Strong collaboration features
    • My team cut our painful three-hour weekly meetings down to just 90 minutes after we started using Asana to track action items. The time saved meant more hours for actual design work.

    Cons:

    • Not specifically designed for construction or engineering
    • Limited document management capabilities
    • Basic reporting compared to industry-specific tools

    Pricing: Free for basic features, Business plan at $24.99/user/month, Enterprise pricing available upon request.

    Ideal Use Case: Civil engineering teams looking for an affordable way to track design deliverables, action items, and internal workflows without investing in a comprehensive construction platform.

    Learn More about Asana

    Tool Best For Price Range Key Strength
    Autodesk Construction Cloud Large infrastructure projects $460-$1,270/user/year BIM Integration
    Primavera P6 Complex scheduling needs ~$2,500/license + maintenance Advanced scheduling
    Procore Mid-sized firms $375-$1,200/month Document management
    BuilderTrend Small firms $99-$699/month Client communication
    Microsoft Project Microsoft ecosystem users $10-$30/user/month Microsoft integration
    PlanGrid Field-heavy projects $39-$119/user/month Mobile plan access
    Asana Teams on a budget Free – $24.99/user/month Task management
    Key Takeaway: There’s no one-size-fits-all solution for civil engineering project management. Large infrastructure projects benefit from comprehensive tools like Autodesk Construction Cloud or Primavera P6, while smaller firms might find better value in Procore or BuilderTrend. Your project size, team structure, and specific workflows should guide your selection.

    How to Choose the Right Tool for Your Engineering Team

    After testing dozens of tools across various project types, I’ve developed a simple framework to help you select the right solution:

    1. Assess your project complexity: For large infrastructure projects with multiple stakeholders, prioritize robust tools like Primavera P6. For smaller projects, lighter solutions like BuilderTrend may be sufficient.
    2. Consider your team’s technical proficiency: If your team includes less tech-savvy members, prioritize intuitive interfaces over advanced features.
    3. Evaluate integration requirements: List all existing software your team uses and prioritize PM tools that connect seamlessly.
    4. Test before committing: Always run a small pilot project before rolling out to your entire organization.
    5. Calculate total cost of ownership: Factor in training, setup, and ongoing support when comparing prices—not just the monthly subscription.

    The best approach is often to start with a simpler tool and grow into more complex solutions as your team’s needs evolve.

    Seamless Integration: Connecting Your PM Tool with Your Engineering Ecosystem

    The power of project management software multiplies when it connects smoothly with the other tools in your engineering toolkit. Integration isn’t just a nice-to-have feature—it’s essential for eliminating data silos and duplicated work.

    When I implemented Procore at my previous company, we reduced data entry time by 30% by connecting it directly to our accounting system and BIM software. Here’s what you should know about integration possibilities:

    Common Integration Methods:

    • Direct integrations (built-in connections to popular software)
    • APIs (Application Programming Interfaces) for custom connections
    • Middleware solutions that connect otherwise incompatible systems
    • CSV/Excel import/export capabilities

    Real-World Integration Examples:

    • Autodesk Construction Cloud directly integrates with Revit and AutoCAD, allowing for seamless data exchange between design and construction teams.
    • Procore offers connections to over 300 applications, including popular accounting systems like QuickBooks and Sage.
    • Even simpler tools like Asana offer Zapier integrations to connect with hundreds of other business applications.

    When evaluating tools, always ask about their integration capabilities with your existing software ecosystem. The most powerful PM tool becomes significantly less valuable if it creates a data island.

    Implementation Tips: Avoiding Common Pitfalls

    From my experience rolling out new PM tools across multiple organizations, here are the most common implementation mistakes to avoid:

    1. Trying to implement everything at once: Start with core features and add complexity gradually as your team gains comfort.
    2. Skimping on training: Even the most intuitive tools require proper onboarding. Budget time and resources for comprehensive training.
    3. Failing to standardize processes: Document your workflows before implementing software, not after.
    4. Neglecting mobile users: Field teams have different needs than office staff. Make sure your solution works well in low-connectivity environments.
    5. Ignoring resistance to change: Address concerns openly and demonstrate clear benefits to get buy-in from skeptical team members.

    When I introduced PlanGrid to a resistant field crew, I found that pairing tech-savvy team members with those who were more hesitant created natural mentorship that dramatically improved adoption rates.

    Real-World Results: Quantifying the ROI of Project Management Tools in Civil Engineering

    Implementing the right project management tool isn’t just about convenience—it delivers measurable business outcomes. Here’s what real civil engineering firms have achieved:

    Time Savings:

    • A mid-sized civil engineering firm reported a 28% reduction in time spent on administrative tasks after implementing Procore, freeing up engineers to focus on technical work.
    • Field teams using PlanGrid reduced time spent searching for current drawings by 67% compared to paper-based methods.

    Cost Reductions:

    • A highway construction project using Autodesk Construction Cloud reduced rework costs by 32% through improved document control and communication.
    • One municipal engineering department saved $180,000 annually in labor costs after streamlining workflows with Microsoft Project.

    Quality Improvements:

    • A bridge construction team using Primavera P6 reduced schedule overruns by 41% through better resource planning and critical path management.
    • RFI response times decreased by an average of 73% when firms moved from email to dedicated project management platforms.

    When I directed a water treatment facility expansion in 2021, our team slashed change orders by 35% after switching to a dedicated PM tool. Better documentation meant fewer misunderstandings, saving us nearly $40,000 in just the first quarter!

    Metrics to Track:

    • Project completion time variance
    • Budget adherence percentages
    • Number of RFIs and response time
    • Client satisfaction scores
    • Rework frequency and cost
    Key Takeaway: Project management tools deliver measurable ROI through time savings, cost reductions, and quality improvements. Track metrics like schedule variance, budget adherence, and rework rates to quantify your software’s impact. Even smaller civil engineering firms typically see positive ROI within 3-6 months of implementation.

    Looking Ahead: The Future of Project Management in Civil Engineering

    Project management tools for civil engineering are evolving rapidly, with several game-changing technologies on the horizon:

    AI and Automation:

    • AI-powered scheduling tools can now analyze thousands of similar projects and suggest optimal task sequences and durations.
    • Automated progress monitoring using computer vision and drone imagery is eliminating manual reporting requirements.
    • Smart algorithms can detect potential conflicts and risks before they impact the project.

    Digital Twins:

    • Virtual representations of physical infrastructure that update in real-time are enabling unprecedented monitoring capabilities.
    • Engineers can simulate various scenarios before implementing changes in the real world.
    • Maintenance planning is being revolutionized by predictive analytics tied to digital twin models.

    Increased Mobile Capabilities:

    • Field data collection is becoming more sophisticated, with augmented reality allowing teams to visualize subsurface utilities.
    • Real-time synchronization means decisions can be made immediately, even on remote sites.

    As civil engineers, we must stay adaptive as these technologies mature. The tools we use today will likely look quite different in just a few years, offering even greater opportunities for efficiency and innovation.

    Dr. Sarah Martinez, Director of Digital Innovation at the American Society of Civil Engineers, predicts: “By 2026, we expect to see AI assistants that can draft project schedules, identify regulatory compliance issues, and even suggest design optimizations based on constructability concerns.”

    Your Burning Questions Answered: Project Management Tools for Civil Engineers

    What are the best project management tools for civil engineers?

    For large infrastructure projects with BIM requirements, Autodesk Construction Cloud and Primavera P6 lead the industry. Mid-sized firms often find the best balance with Procore or Microsoft Project. Smaller teams or those on tighter budgets might prefer BuilderTrend or Asana for their simplicity and lower cost.

    What makes these tools effective for civil engineering specifically?

    The most effective tools combine robust scheduling capabilities, document control, field collaboration features, and integration with engineering software like CAD and BIM. They account for the unique complexities of civil engineering projects, including regulatory compliance, dispersed teams, and detailed technical documentation.

    How much do these tools typically cost?

    Prices range dramatically from free (basic Asana) to over $1,000 per user annually (Autodesk Construction Cloud or Primavera P6). Most mid-range solutions cost between $30-$60 per user per month. Enterprise pricing typically involves volume discounts and customized implementation services.

    Are these tools difficult to learn?

    Learning curves vary significantly. Tools like PlanGrid and Asana can be learned in a few hours, while comprehensive platforms like Primavera P6 might require weeks of training for proficiency. Most vendors offer implementation support, training resources, and customer service to help teams get up to speed.

    Can I use these tools for small projects?

    Absolutely! While some tools are designed for large-scale infrastructure projects, options like BuilderTrend, Asana, and even scaled-down versions of Procore work well for smaller civil engineering projects. The key is matching the tool’s capabilities to your specific project needs rather than overbuying features you won’t use.

    Do these tools offer mobile apps?

    All the tools mentioned offer mobile capabilities, but the quality varies. PlanGrid and Procore are widely considered to have the strongest mobile experiences, while Primavera P6 has more limited mobile functionality. Always test the mobile app before committing to ensure it meets your field team’s needs.

    Empowering Civil Engineers with the Right Project Management Tools

    Finding the perfect project management tool for your civil engineering work isn’t just about features or price—it’s about finding a solution that fits your team’s specific workflows and challenges. Whether you’re managing massive infrastructure projects or smaller municipal improvements, the right tool can transform your efficiency and outcomes.

    Throughout my career, I’ve seen project management tools evolve from simple scheduling applications to comprehensive platforms that unite teams, streamline communication, and provide unprecedented visibility into project health. The tools highlighted in this guide represent the best options available today for civil engineers looking to improve their project delivery.

    Remember that successful implementation requires more than just purchasing software—it demands organizational commitment, proper training, and continuous refinement of processes. Start with a clear understanding of your specific needs, carefully evaluate your options, and be prepared to invest time in setup and adoption.

    Ready to revolutionize your civil engineering projects? Start by testing one of these tools with a small project team. And while you’re learning the software, check out our practical video lectures on engineering project management that show real-world applications. Want help with job interviews in engineering firms that use these tools? Our Interview Questions page has you covered! If you’re updating your resume to highlight your project management skills, don’t miss our Resume Builder designed specifically for engineers.

    Have you used any of these project management tools in your civil engineering work? Share your experiences in the comments below!

  • Structural Engineering 101: Mastering the Essentials

    Structural Engineering 101: Mastering the Essentials

    Have you ever looked up at a skyscraper and wondered what keeps it standing during powerful storms? Or walked across a bridge and felt completely safe despite being suspended hundreds of feet in the air? That’s structural engineering at work — the unsung hero behind every building and bridge you’ve ever used.

    Structural engineering is what keeps our buildings standing strong and our bridges safe to cross. During my time at Jadavpur University and my early career, I struggled with these complex concepts. Now, as someone who’s made the leap from engineering textbooks to real-world projects, I want to share what I wish someone had told me when I was starting out.

    In this guide, we’ll explore what structural engineers actually do, why their work matters, and the key principles you need to master to succeed in this field. Whether you’re considering structural engineering as a career path or looking to strengthen your foundational knowledge, you’ll find practical insights to help you build a solid career foundation.

    Want to kickstart your professional journey? Check out our Resume Builder Tool specifically designed for engineering graduates entering the job market.

    What is Structural Engineering? Defining the Field

    Structural engineering is a specialized branch of civil engineering that focuses on analyzing and designing structures that can safely resist loads and forces. In simple terms, structural engineers make sure buildings don’t collapse and bridges don’t fall down.

    But the work goes far beyond that basic description. When I started my first internship, I was surprised by how varied a structural engineer’s responsibilities actually are:

    • Calculating how structures will handle various loads (weight, wind, earthquakes)
    • Selecting appropriate materials and determining their dimensions
    • Creating structural drawings and specifications
    • Inspecting existing structures for safety and compliance
    • Collaborating with architects, contractors, and other engineers
    • Problem-solving when construction challenges arise

    The scope of structural engineering covers virtually every built structure you encounter daily. From the apartment building you live in to the office where you work, from bridges you cross on your commute to stadiums where you watch sports events — all require structural engineering expertise.

    What makes structural engineering so important? First and foremost is public safety. When I design a structure, I’m acutely aware that people’s lives depend on my calculations being correct. Beyond safety, structural engineering enables architectural vision, economic development, and infrastructure advancement. Without it, our modern built environment simply couldn’t exist.

    Key Takeaway: Structural engineering is the specialized field that ensures buildings and structures can safely handle all forces acting upon them. Its importance extends beyond safety to enabling architectural creativity, economic development, and modern infrastructure.

    Key Principles of Structural Engineering

    Understanding Loads and Forces

    Every structure, from a backyard shed to the Burj Khalifa, must resist various loads and forces. During my undergraduate studies at Jadavpur University, I initially struggled with load calculations until a professor explained it using everyday examples — like how different forces act on a table when you place objects on it versus when you bump into it.

    Different types of loads affect structures in unique ways:

    Dead Loads

    These are permanent, stationary forces that include the weight of the structure itself and fixed elements. The concrete floors, steel beams, walls, and permanent equipment all contribute to dead loads. These are relatively predictable and consistent. I recall my first renovation project where we had to account for the weight of new terrazzo flooring — nearly three times heavier than the carpet it was replacing!

    Live Loads

    These are temporary, movable forces acting on the structure. These include:

    • People moving through a building
    • Furniture and movable equipment
    • Snow accumulation on roofs
    • Stored materials or merchandise

    Live loads can vary significantly. When designing a library floor, I had to account for fully loaded bookshelves weighing over 150 pounds per square foot — much heavier than typical office loads.

    Wind Loads

    Wind loads become particularly important for tall buildings and bridges. Wind creates pressure against structural faces and can cause swaying or vibration. Engineers must calculate wind loads based on:

    • Building height and shape
    • Geographic location
    • Local wind patterns
    • Surrounding structures

    During my first high-rise project, I was surprised to learn we had to design the top floors to accommodate lateral movements of nearly 6 inches during strong storms!

    Seismic Loads

    These are generated during earthquakes. These dynamic, horizontal forces can severely damage structures not designed to withstand them. In my structural dynamics course, we spent weeks learning how to model a building’s response to different earthquake waveforms.

    Engineers don’t just consider these loads individually — we analyze how different combinations of loads might interact simultaneously. For example, a building might need to withstand dead loads, maximum occupancy (live loads), and hurricane-force winds all at once.

    Key Takeaway: Structural engineers must account for multiple types of loads (dead, live, wind, and seismic) acting simultaneously on structures. Understanding how these forces interact is fundamental to creating safe designs that withstand real-world conditions.

    Material Properties

    The materials we select dramatically influence a structure’s strength, durability, cost, and appearance. Each material has unique properties that make it suitable for specific applications.

    Steel

    Steel remains one of the most versatile structural materials due to its:

    • High strength-to-weight ratio (allowing for longer spans and taller structures)
    • Predictable behavior under various loads
    • Ductility (ability to deform before failure, providing warning signs)
    • Speed of construction
    • Recyclability

    However, steel requires fire protection and can be susceptible to corrosion in certain environments. On a warehouse project I worked on, we had to specify special galvanized steel connections because the building was located near the coast where salt air would accelerate corrosion.

    Concrete

    Concrete is incredibly versatile and widely used because it offers:

    • Excellent compressive strength
    • Fire resistance
    • Durability and low maintenance
    • Ability to be formed into virtually any shape
    • Good sound insulation

    Plain concrete has poor tensile strength, which is why we typically reinforce it with steel bars (rebar) to create reinforced concrete. This combination leverages the compressive strength of concrete with the tensile strength of steel.

    During my engineering studies, I found concrete design particularly fascinating because of how dramatically reinforcement changes its performance. I still remember the lab experiment where we tested a plain concrete beam that snapped suddenly compared to a reinforced beam that bent gradually, giving plenty of warning before failure. Properly placed rebar transforms a brittle material into one that can withstand complex forces.

    Wood

    Wood has been used in construction for thousands of years and remains popular for:

    • Good strength-to-weight ratio
    • Natural renewability
    • Ease of construction with simple tools
    • Aesthetic appeal
    • Carbon sequestration benefits

    Wood’s properties vary significantly between species and cutting methods. Its main limitations include vulnerability to fire, moisture, and insects, though modern treatments can address many of these concerns.

    I once worked on restoring a 100-year-old timber-framed building where the original heart pine beams were still in excellent condition—stronger than most modern lumber you can buy today. That experience gave me tremendous respect for wood as a structural material.

    Material Key Strengths Limitations Typical Applications
    Steel High strength, ductility, speed of construction Requires fire protection, potential corrosion High-rises, long-span bridges, industrial buildings
    Concrete Compressive strength, durability, fire resistance Poor tensile strength, heavy, longer curing time Foundations, high-rise buildings, bridges, dams
    Wood Renewable, good strength-to-weight ratio, easy to work with Vulnerable to moisture, fire, insects Residential buildings, low-rise commercial, timber bridges

    Material testing is critical to verify that the actual materials delivered to construction sites meet design specifications. I’ve seen projects delayed when concrete cylinder tests failed to reach the required strength, requiring additional curing time or even demolition and replacement.

    Key Takeaway: Each structural material (steel, concrete, wood) has unique properties that determine its appropriate applications. Understanding these properties is essential for selecting the right material for specific structural elements and creating safe, efficient designs.

    Design Fundamentals

    Equilibrium and Stability

    Equilibrium and stability form the foundation of structural design. Without these principles, no structure would remain standing for long.

    Equilibrium refers to the state where all forces acting on a structure balance out – essentially, nothing is moving. For a structure to be in equilibrium, it must satisfy:

    1. The sum of all horizontal forces equals zero
    2. The sum of all vertical forces equals zero
    3. The sum of all moments (rotational forces) equals zero

    When any of these conditions isn’t met, the structure will move in response to the unbalanced forces. This might manifest as sliding, lifting, or rotation.

    I remember working on my first bridge design project in college. I kept getting confused about why my calculations weren’t balancing until I realized I had forgotten to account for the horizontal component of a cable force. It taught me that overlooking even one force component can lead to a fundamentally flawed design. My professor marked my error in bright red pen — a mistake I never made again!

    Stability takes equilibrium a step further. A structure might be in equilibrium at a particular moment but become unstable when disturbed slightly. Think of a pencil balanced on its point – it’s technically in equilibrium until the slightest breeze knocks it over.

    Factors affecting stability include:

    • Geometry and proportions
    • Connection types
    • Bracing systems
    • Foundation design
    • Material properties

    Instability manifests in several ways:

    • Global instability affects the entire structure, like when a building leans and eventually collapses
    • Local instability affects individual elements, such as column buckling
    • Lateral instability occurs when a structure can’t resist side-to-side forces

    In my structural dynamics class, we watched footage of the Tacoma Narrows Bridge collapse in 1940 – a haunting example of stability failure. The bridge was perfectly balanced under normal conditions, but once wind created those infamous oscillations, the whole structure twisted itself apart. This video scared me into triple-checking all my wind calculations on later projects! This disaster completely changed how we design bridges for wind forces.

    Common Structural Elements

    Building structures rely on several key elements working together to transfer loads safely to the ground. During my first internship, I created a simple mental model of load transfer that still helps me explain structural systems to clients: loads flow like water, always seeking a path to the ground.

    Beams

    Beams are horizontal elements that primarily resist bending forces. When a load pushes down on a beam, the top portion compresses while the bottom portion stretches (tension). Beams transfer loads laterally to columns or walls.

    Beam types include:

    • Simple beams (supported at both ends)
    • Cantilever beams (supported at only one end)
    • Continuous beams (spanning multiple supports)

    I once had to design a special transfer beam that carried the load of several columns above it to allow for an open lobby space below. That single beam was carrying more load than most entire floors!

    Columns

    Columns are vertical elements that primarily carry compressive loads downward. They transfer the loads from beams to foundations. Columns can fail through:

    • Crushing (material failure under compression)
    • Buckling (bending under load when too slender)
    • Connection failure

    During an inspection of an older building, I discovered a column that had been dangerously compromised when a plumbing contractor cut through part of it to install a new pipe. We had to install emergency shoring that same day before designing a permanent repair.

    Trusses

    Trusses are frameworks of connected elements forming triangular units. The triangular arrangement creates exceptional strength and rigidity, making trusses ideal for spanning long distances. Each member in a truss experiences either pure tension or pure compression.

    Common truss applications include:

    • Roof systems
    • Long-span bridges
    • Tower structures
    • Floor systems in industrial buildings

    During my graduate research, I built and tested a scale model of a novel truss design that used 15% less material while maintaining the same strength. The key was optimizing the geometry based on actual load paths rather than traditional configurations.

    Slabs

    Slabs are flat, typically horizontal elements that create floors and roofs. They distribute loads across their surface area and transfer them to supporting beams or walls. Slabs can be:

    • One-way (primarily spanning in one direction)
    • Two-way (spanning in both directions)
    • Flat (without supporting beams)
    • Waffle or ribbed (with integrated stiffening elements)

    Foundations

    Foundations form the critical interface between structures and the ground. They spread concentrated loads from columns and walls across larger soil areas to prevent settlement or failure. Foundation types include:

    • Spread footings
    • Strip foundations
    • Raft foundations
    • Pile foundations
    • Caissons

    The trickiest foundation I ever designed was for a building on a site with vastly different soil conditions from one end to the other. We ended up with three different foundation systems that had to work together without causing differential settlement. It took weeks of analysis to get it right!

    Key Takeaway: Successful structural design relies on achieving both equilibrium (balancing all forces) and stability (maintaining equilibrium when disturbed). Understanding how different structural elements (beams, columns, trusses, slabs, foundations) work together to transfer loads is essential for creating safe, efficient structures.

    Modern Tools and Technologies

    The field of structural engineering has transformed dramatically with technological advancements. When I started studying engineering, we were still doing many calculations by hand on graph paper. I spent countless hours with a calculator and straight edge! Today’s structural engineers have powerful digital tools that expand what’s possible.

    Structural Analysis Software

    Structural analysis software has revolutionized how engineers model and analyze complex structures. Programs like SAP2000, ETABS, and STAAD Pro allow engineers to:

    • Create detailed 3D models of entire structures
    • Simulate various loading conditions
    • Automatically calculate internal forces and stresses
    • Identify potential failure points
    • Optimize structural components for efficiency

    I still remember my first major project using analysis software. What would have taken me weeks of hand calculations was completed in hours. However, I’ve found that the best engineers still understand the underlying principles well enough to verify that computer results make sense. During my early career, I caught a serious modeling error because the deflection results didn’t match my rough hand calculations.

    Building Information Modeling (BIM)

    Building Information Modeling (BIM) has transformed coordination between different disciplines. Software like Revit and ArchiCAD creates comprehensive digital representations of buildings that include:

    • Architectural elements
    • Structural components
    • Mechanical systems
    • Electrical systems
    • Plumbing systems

    All these systems exist in a single model, allowing engineers to detect clashes (like a beam intersecting with ductwork) before construction begins. According to Autodesk, BIM can reduce construction costs by up to 20% through improved coordination and reduced rework.

    On a hospital project I worked on last year, we identified over 300 clashes between structural elements and mechanical systems during the BIM coordination process. Fixing these issues virtually saved hundreds of thousands of dollars compared to discovering them during construction.

    Computational Design

    Computational design uses algorithms to generate and evaluate multiple design options. Rather than creating a single solution manually, engineers can set parameters and let computers explore countless variations to find optimal designs.

    This approach particularly shines in:

    • Complex geometries for signature architecture
    • Weight optimization for material efficiency
    • Structural performance enhancement

    I worked with a computational design specialist to optimize a roof truss system that saved nearly 30% in steel tonnage compared to our initial design. The computer-generated geometry looked unusual but performed beautifully under all loading conditions.

    Virtual Reality (VR) and Augmented Reality (AR)

    I recently used Virtual Reality (VR) on a project to walk my client through their building before we even broke ground. The look on their face when they could actually ‘see’ how the structural beams would frame their space was priceless! These technologies are game-changers that let us:

    • Experience designs in 3D before spending a dollar on construction
    • Show clients exactly how structural systems will look in their space
    • Spot potential problems during virtual site walk-throughs
    • Train new engineers without the risks of actual construction sites

    While these tools have transformed the profession, they complement rather than replace engineering judgment. The most successful structural engineers leverage technology while maintaining strong fundamental knowledge.

    Case Studies and Applications

    Success Story: The Burj Khalifa

    The world’s tallest building stands as a testament to structural engineering innovation. At 828 meters (2,717 feet) tall, the Burj Khalifa in Dubai required groundbreaking structural solutions.

    The primary challenge was resisting enormous wind forces that increase dramatically with height. The solution? A buttressed core structural system with a Y-shaped floor plan that disrupts wind vortices and prevents rhythmic swaying.

    The foundation system is equally impressive – 194 piles extending 43 meters deep support a 3.7-meter thick concrete raft. Together, they distribute the building’s massive weight despite Dubai’s challenging soil conditions.

    According to The Skyscraper Center, the Burj Khalifa contains over 330,000 cubic meters of concrete and 39,000 tonnes of steel reinforcement. Yet the structure’s efficiency comes from its engineering rather than brute material strength.

    During a conference I attended, one of the Burj Khalifa engineers explained that the building’s Y-shaped design wasn’t just architectural flair—it was fundamentally a structural solution that allowed the tower to reach unprecedented heights by minimizing wind effects. It’s a perfect example of how structure and architecture can work in harmony.

    Failure Analysis: Hyatt Regency Walkway Collapse

    Not all case studies celebrate success. In 1981, suspended walkways in the Kansas City Hyatt Regency hotel collapsed, killing 114 people and injuring over 200 others.

    The original design called for walkways to be suspended from the ceiling using continuous rods. During construction, a seemingly minor change was made – instead of single rods running the entire height, the builder used shorter rods connecting the upper walkway to the lower walkway.

    This change doubled the load on the upper walkway connections, which eventually failed catastrophically during a crowded event. The tragedy highlights the critical importance of reviewing even “minor” design changes and understanding load paths completely.

    This case study had a profound impact on me as a young engineer. During my first job, I questioned a contractor’s proposed “minor modification” to a connection detail that would have compromised its load capacity. My supervisor later told me that my attention to detail potentially prevented a serious structural issue. I often reflect on this case when working on projects. It reminds me that engineering isn’t just about calculations – it’s about clear communication, careful review processes, and professional responsibility.

    Innovation Case: The Beijing National Stadium

    The “Bird’s Nest” stadium built for the 2008 Olympics showcases how structural engineering can enable architectural vision. The seemingly random steel mesh exterior is actually a carefully engineered structural system that:

    • Forms the primary support structure
    • Creates an iconic visual appearance
    • Addresses seismic concerns
    • Accommodates thermal expansion
    • Provides cost-effective construction

    The building demonstrated how advanced computer modeling could turn ambitious architectural concepts into buildable structures – something that would have been nearly impossible using traditional design methods.

    When I visited the Bird’s Nest during a trip to Beijing, I was struck by how the structural system wasn’t hidden away but celebrated as the building’s defining feature. It’s a powerful example of structure as architecture.

    These case studies demonstrate that structural engineering isn’t just theoretical – it has real-world implications for safety, innovation, and pushing the boundaries of what’s possible in our built environment.

    Key Takeaway: Real-world structural engineering successes and failures provide invaluable lessons. The Burj Khalifa demonstrates how innovative structural systems can enable unprecedented heights, while the Hyatt Regency collapse shows how seemingly minor changes can have catastrophic consequences when load paths are not thoroughly understood.

    Sustainability and Future Trends

    Sustainability has become non-negotiable in modern structural engineering. When I entered the field 15 years ago, sustainability was often considered an optional “green” add-on. Today, it’s fundamental to our practice. I’ve witnessed sustainability transform from a nice-to-have feature to a core consideration in every project I work on.

    Material Innovation

    Material innovation leads the sustainability charge:

    Low-carbon concrete reduces the massive carbon footprint of traditional concrete by using alternative binders and recycled materials. Some newer formulations can even absorb CO2 during curing. On a recent project, we specified a concrete mix that reduced carbon emissions by 30% while maintaining the same strength properties.

    Mass timber construction uses engineered wood products like cross-laminated timber (CLT) to create structural systems for mid-rise and even high-rise buildings. Beyond being renewable, wood sequesters carbon throughout the building’s life. I recently designed my first 8-story CLT building, and it was remarkable how quickly the structure went up compared to concrete or steel.

    Recycled steel significantly reduces energy consumption compared to virgin steel production. Modern structural steel typically contains 90-98% recycled content. When specifying steel for projects, I now routinely require documentation of recycled content percentages.

    Adaptive Reuse

    Adaptive reuse represents another sustainable approach. Retrofitting existing structures rather than demolishing and rebuilding them preserves the “embodied carbon” already invested in the original construction. This approach requires specialized structural engineering to:

    • Assess existing structural capacities
    • Design compatible reinforcements
    • Accommodate new usage patterns and code requirements

    One of my favorite projects involved converting an old warehouse into a tech company headquarters. We preserved the original timber columns and beams, added strategic steel reinforcements where needed, and created an entirely new mezzanine level within the existing volume. The building’s character remained intact while its carbon footprint was a fraction of what new construction would have generated.

    Resilient Design

    Resilient design has gained importance as climate change increases extreme weather events. Structures now need to withstand:

    • More frequent and severe storms
    • Rising sea levels
    • Higher temperature extremes
    • Changing precipitation patterns

    Engineers are responding with designs that not only withstand these challenges but can quickly recover from them. After working on restoration projects following several hurricanes, I’ve completely changed how I approach certain details in coastal structures—designing not just for strength but for repairability and component isolation so damage can be contained.

    Emerging Technologies

    Emerging technologies continue to reshape what’s possible:

    • 3D printing of structural components reduces waste and enables complex geometries
    • Self-healing materials can repair minor damage automatically
    • Smart structures use embedded sensors to monitor structural health in real-time
    • Biomimicry applies nature’s time-tested structural solutions to human-made challenges

    I recently collaborated with a research team testing self-healing concrete for bridge applications. The material contains capsules of healing agents that activate when cracks form, potentially extending service life by decades.

    These innovations are creating exciting opportunities for new graduates entering the field. During my career, I’ve had to continually learn new technologies and approaches – that adaptability is perhaps the most valuable skill for long-term success in structural engineering.

    A Day in the Life of a Structural Engineer

    People often ask me what structural engineers actually do all day. The reality is both more varied and more interesting than most imagine. A typical day in my practice might include:

    Morning: Running computer analyses of a building frame, adjusting beam sizes to optimize material usage while ensuring the structure can handle all design loads. This means balancing between safety (which often means larger elements) and efficiency (using less material).

    Mid-day: Site visit to an ongoing construction project to inspect steel connections before they’re enclosed by finishes. On one memorable visit, I spotted an incorrectly installed beam connection that could have caused problems later.

    Afternoon: Coordination meeting with architects and mechanical engineers to resolve conflicts between HVAC ducts and structural beams. These meetings often involve creative problem-solving as we work together to find solutions that satisfy everyone’s requirements.

    Late day: Mentoring a junior engineer on the structural design of a concrete retaining wall, explaining how soil pressure creates unique loading patterns that change our reinforcement approach.

    The variety keeps the work engaging, and there’s a tremendous satisfaction in walking past buildings you helped create, knowing they’ll safely serve people for decades to come.

    FAQ Section

    What does a structural engineer do?

    Structural engineers design and analyze elements that provide strength and stability to buildings and infrastructure. Their daily work typically includes:

    • Performing structural calculations and analysis
    • Creating detailed structural drawings and specifications
    • Reviewing architectural plans for structural feasibility
    • Conducting site visits during construction
    • Collaborating with architects, contractors, and other engineers
    • Solving problems that arise during design and construction
    • Inspecting existing structures for safety and code compliance

    Structural engineers can specialize in building structures, bridges, industrial facilities, offshore structures, or specialty structures like stadiums and towers.

    In my practice, the most enjoyable moments come from problem-solving—finding elegant solutions to complex structural challenges that support the architectural vision while keeping buildings safe and economical.

    What are the key skills required to become a structural engineer?

    Success in structural engineering requires a blend of technical and soft skills:

    • Strong math and physics fundamentals
    • Analytical thinking and problem-solving abilities
    • Spatial visualization skills
    • Attention to detail (mistakes can have serious consequences)
    • Communication skills (explaining technical concepts to non-engineers)
    • Computer proficiency (CAD and analysis software)
    • Knowledge of building codes and standards
    • Project management capabilities

    While technical skills are necessary, I’ve found that communication abilities often distinguish the most successful engineers. Complex ideas must be explained clearly to clients, architects, and contractors. Some of the best engineers I know can sketch a structural concept on the back of a napkin in a way that makes immediate sense to non-engineers.

    What is the difference between a structural engineer and a civil engineer?

    Civil engineering is a broad field that encompasses many specialties, including structural engineering. Think of structural engineering as a specialized subset of civil engineering.

    Civil engineers may work on various infrastructure projects including:

    • Roads and highways
    • Water supply and treatment systems
    • Environmental systems
    • Transportation planning
    • Construction management
    • Geotechnical engineering
    • Structural engineering

    Structural engineers focus specifically on analyzing and designing structures to resist loads and forces. They typically have more specialized knowledge of building materials, structural analysis, and design techniques.

    During my undergraduate studies at Jadavpur University, I started in general civil engineering before specializing in structures. The transition felt like zooming in from a broad overview to deep expertise in one critical area.

    What are some common challenges faced by structural engineers?

    Structural engineers regularly navigate numerous challenges:

    • Balancing safety requirements with cost constraints
    • Coordinating with other disciplines (architectural, mechanical, electrical)
    • Adapting designs to accommodate unexpected site conditions
    • Meeting increasingly stringent energy and sustainability requirements
    • Staying current with evolving building codes and standards
    • Designing for uncertain future conditions (climate change, usage changes)
    • Managing liability and professional risks

    Each project brings unique challenges, which is what makes the profession both demanding and rewarding. One of my most challenging projects involved designing a hospital addition that had to connect seamlessly to an existing building while meeting current seismic codes that were much stricter than when the original structure was built.

    How can I get started in structural engineering?

    The typical path to becoming a structural engineer includes:

    1. Earning a bachelor’s degree in civil or structural engineering from an accredited program
    2. Gaining practical experience through internships during college
    3. Passing the Fundamentals of Engineering (FE) exam
    4. Working under experienced engineers for several years
    5. Obtaining a Professional Engineer (PE) license after passing the PE exam
    6. Potentially pursuing specialized certifications or advanced degrees

    For students, I recommend joining engineering organizations like the American Society of Civil Engineers (ASCE) or the Structural Engineering Association in your region. These connections provide mentorship opportunities and job leads that aren’t always publicly advertised.

    My own career started with an internship I found through my university’s engineering society. That first professional experience taught me practical skills that weren’t covered in my coursework and led directly to my first full-time position after graduation.

    Preparing for interviews? Our Interview Questions page has specific structural engineering questions to help you succeed.

    Conclusion

    Structural engineering combines scientific principles, creative problem-solving, and practical implementation to create the infrastructure we rely on daily. From ensuring buildings can withstand earthquakes to enabling architects to push the boundaries of what’s possible, structural engineers play a crucial role in shaping our built environment.

    We’ve covered the fundamental concepts every aspiring structural engineer should understand:

    • The various loads and forces that act on structures
    • The properties of common structural materials
    • Design principles that ensure equilibrium and stability
    • The functions of key structural elements
    • Modern tools and technologies revolutionizing the field
    • Real-world applications through case studies
    • Sustainability trends shaping the future of the profession

    As you continue your journey from college to career in structural engineering, remember that the field rewards both technical mastery and creative thinking. The most successful structural engineers combine strong analytical skills with the ability to envision innovative solutions.

    My own path from engineering student to practicing structural engineer had its challenges, but the satisfaction of seeing my designs become reality makes every difficult calculation worth it. There’s something profoundly rewarding about creating structures that will protect and serve people for generations.

    Want to deepen your understanding of structural engineering through video-based learning? Check out our Learn from Video Lectures section with specialized content for engineering students making the transition to professional practice.

    Whether you’re designing your first beam or planning the next record-breaking skyscraper, the fundamental principles we’ve discussed will serve as your foundation for success in this rewarding field.

  • Navigating Civil Engineering Challenges: Real-Life Solutions

    Navigating Civil Engineering Challenges: Real-Life Solutions

    I still vividly remember my first day on a construction site after graduating with my B.Tech from Jadavpur University. The project manager handed me a set of blueprints and said, “Let’s see what they taught you in school.” Within hours, we discovered the soil at the site was completely different from what the geotechnical report showed. That was my first taste of real-world civil engineering challenges – they rarely match what’s in the textbooks.

    Real-world civil engineering challenges look nothing like what’s in textbooks. You’ll need to balance technical problems, government rules, environmental issues, and project deadlines – all at the same time. As infrastructure development continues to grow, understanding how to navigate these challenges effectively becomes crucial for engineers making the transition from college to career.

    In this post, I’ll share practical insights from my years of experience working across various engineering domains, from product-based companies to client-facing roles in multinational corporations, and explore solutions that can help you overcome common obstacles in civil engineering projects.

    What We’ll Cover

    • Common civil engineering challenges beyond what you learn in school
    • Technical challenges: safety, quality control, and technology adoption
    • Navigating complex regulations and environmental requirements
    • Project management hurdles and how to overcome them
    • Practical solutions using modern technology and approaches
    • How to effectively engage communities and stakeholders
    • Risk management strategies that actually work
    • Answers to frequently asked questions about civil engineering challenges

    Common Civil Engineering Challenges: Beyond the Textbook

    When I started Colleges to Career, I wanted to address the gap between what students learn and what they actually face in the workforce. Civil engineering is a perfect example of this disconnect. Let’s dive into the key challenges you’ll likely encounter on real projects.

    Technical Challenges

    Site safety issues remain one of the most critical concerns in civil engineering. According to the Occupational Safety and Health Administration (OSHA), construction accounted for 21.1% of worker fatalities in private industry in 2021. I’ve seen firsthand how implementing comprehensive safety protocols – not just on paper but in practice – makes a tremendous difference.

    Quality control presents another major challenge. On one project I consulted on, the contractor rushed the concrete curing time. Within months, we started seeing cracks that could have been easily prevented. This required expensive repairs and delayed the project by weeks. The solution was simple: establishing clear testing procedures and regular inspections at critical project stages.

    Technology integration can be both a challenge and a solution. Many construction firms struggle to adopt new tools like Building Information Modeling (BIM) and Internet of Things (IoT) sensors. Learning these new tools takes time, but I’ve seen them make a huge difference. On one project, using BIM helped us catch design flaws early and saved over $50,000 in potential rework costs.

    Key Takeaway: Technical challenges in civil engineering aren’t just about design – they involve maintaining rigorous safety standards, implementing quality control measures, and strategically integrating new technologies to improve project outcomes.

    Regulatory Compliance

    Getting all the necessary permits and approvals is often the most frustrating part of civil engineering projects. For a recent infrastructure project, our team had to coordinate with seven different agencies and secure twelve separate permits before breaking ground. The paperwork alone took three months!

    Environmental regulations continue to grow more complex, particularly for projects near protected habitats or water sources. Don’t view environmental impact assessments as just another box to check. They’re actually opportunities to make your project more sustainable and prevent conflicts with the community and environmental groups.

    Here’s a real success story: For a bridge rehabilitation project, our team implemented a proactive regulatory compliance strategy. We identified all required permits at the start, assigned a dedicated compliance officer, and met with regulators early in the process. This approach prevented months of potential delays that often plague similar projects. The project finished two months ahead of schedule – something almost unheard of in civil engineering.

    Environmental and Sustainability Issues

    Climate adaptation has become essential in civil engineering design. During my work on a coastal infrastructure project, we had to completely redesign drainage systems to handle sea-level rise and more frequent storms – considerations that weren’t even on the radar a decade ago.

    Research from the American Society of Civil Engineers shows that using recycled materials can cut a project’s carbon footprint by up to 30%. This isn’t just good for the planet – it often saves money too.

    I’ve seen some impressive innovations in sustainable materials:

    • Recycled plastic composites used for non-structural components
    • Bamboo reinforcement as an alternative to steel in certain applications
    • Self-healing concrete that can repair small cracks without any intervention

    Environmental assessments often reveal unexpected issues. On one project, what looked like a normal construction site turned out to be a seasonal migration path for local wildlife. By adjusting our construction schedule around migration patterns, we avoided harming the environment while keeping the project on track.

    Key Takeaway: Modern civil engineering must address environmental concerns through climate-resilient designs and sustainable materials. These aren’t just “nice to have” features but essential components of successful, future-proof infrastructure.

    Project Management Challenges

    Budget management remains one of the most persistent challenges in civil engineering. A 2021 study by McKinsey found that large construction projects typically exceed their budgets by a staggering 80% on average. Here’s what I’ve found works to avoid budget disasters:

    • Doing thorough site investigations before finalizing designs
    • Including realistic contingency funds (at least 10-15%)
    • Setting up clear procedures for handling change orders
    • Using value engineering throughout the design process

    Schedule delays happen on almost every project. During my time working on a highway expansion project, we discovered unmapped utility lines that added three months to our timeline. A realistic schedule must account for:

    • Weather delays (especially for seasonal work)
    • How long permits and approvals actually take (not what they’re supposed to take)
    • Material delivery lead times
    • Coordination between different subcontractors

    Poor communication between stakeholders often leads to expensive rework and delays. I’ve seen projects where architects, engineers, contractors, and clients each had completely different ideas about the final product. Using collaborative platforms like BIM and holding regular cross-disciplinary meetings helps ensure everyone stays on the same page.

    How to Overcome Civil Engineering Challenges: Practical Solutions

    After years of working with various engineering teams and creating the Colleges to Career platform, I’ve compiled practical strategies that can help you avoid common civil engineering pitfalls.

    Leveraging Emerging Technologies

    Building Information Modeling (BIM) has completely changed how we approach civil engineering projects. Unlike old-school 2D drawings, BIM creates digital 3D models containing detailed information about every part of a structure. On a recent commercial building project, BIM helped us identify 37 conflicts between structural and mechanical systems before construction began, saving hundreds of thousands in potential rework costs.

    IoT sensors give us powerful new ways to monitor infrastructure. Smart bridges equipped with sensors can detect developing structural problems before they become dangerous. The technology is becoming more affordable every year – even smaller projects can now benefit from these tools.

    3D printing is starting to make an impact in civil engineering. While we’re not yet printing entire buildings, 3D printing helps create complex architectural elements, custom formwork, and even some structural components. A colleague recently used 3D-printed models to help community members visualize drainage solutions for a complex site – something that was impossible to explain using flat drawings.

    Key Takeaway: Emerging technologies like BIM, IoT, and 3D printing aren’t just fancy additions to civil engineering – they’re practical tools that can detect potential problems early, improve communication, and ultimately save significant time and money.

    Community and Stakeholder Engagement

    Getting the community involved early in civil engineering projects can prevent costly delays and redesigns. I learned this lesson the hard way when a project I worked on faced intense opposition because residents felt blindsided by the development. Now, I always push for open communication from the very beginning.

    Effective ways to engage stakeholders include:

    • Holding public information sessions with clear, non-technical explanations
    • Using visual tools that help non-engineers understand project impacts
    • Providing regular updates through community channels
    • Actually incorporating community feedback into design revisions

    Building trust with communities isn’t just about public relations – it results in better engineering. Local knowledge often identifies site-specific challenges that formal surveys miss. On a flood control project, community input helped identify historical flooding patterns that weren’t captured in official records, leading to crucial design improvements that ultimately reduced flood damage by 45% compared to the original design.

    Proactive Risk Management

    Start looking for potential problems as early as possible. In my projects, I always check for risks in these four key areas:

    • Technical risks (design complexity, new methods/materials)
    • External risks (weather, market conditions, regulatory changes)
    • Organizational risks (staffing, experience, management structure)
    • Project management risks (scheduling, budgeting, communication)

    For each risk you identify, develop specific plans to address it. This might include:

    • Having alternative design approaches ready
    • Clearly defining who handles what risks in contracts
    • Getting appropriate insurance coverage
    • Building extra time and money into your plans

    Monitor risks regularly throughout the project. What’s risky changes as projects progress – new problems emerge while others become less important. Create a risk register that your team reviews weekly to stay focused on current threats to project success.

    FAQ: Answering Common Questions About Civil Engineering Challenges

    What causes budget overruns in civil engineering projects?

    In my experience, the top causes include poor initial site investigation, unforeseen ground conditions, scope creep, and inadequate contingency allowances. I once worked on a project where we discovered an unmarked utility line during excavation – something that wasn’t identified in any survey. This single issue added 8% to the project budget. To avoid this, invest in thorough site investigations, maintain strict change order procedures, and include realistic contingencies (15% minimum for complex projects).

    How can civil engineers ensure compliance with environmental regulations?

    Start by conducting thorough Environmental Impact Assessments even when not strictly required. Engage regulators early and maintain open communication throughout the project. I’ve found that bringing environmental consultants onto the team from the beginning helps identify potential issues before they become problems. Also, stay current on changing regulations through continuing education and professional organizations.

    What is the role of BIM in solving civil engineering challenges?

    BIM is much more than 3D modeling – it’s a powerful collaboration tool that can find conflicts between systems, analyze constructability, simulate performance, and improve communication between stakeholders. On complex projects, I’ve seen BIM reduce RFIs (Requests for Information) by up to 40% and virtually eliminate major field conflicts. The upfront investment in BIM pays off throughout the project lifecycle.

    How can community engagement contribute to project success?

    When communities feel heard and respected, they’re more likely to support projects rather than fight them. On a contentious infrastructure project, we implemented a comprehensive engagement strategy with regular town halls, a project website with updates, and a community advisory committee. This approach not only prevented delays from public opposition but actually improved our design through valuable local insights that our engineers hadn’t considered, resulting in a 15% increase in user satisfaction after project completion.

    Key Takeaway: Proactive problem-solving is the best approach to civil engineering challenges. Whether it’s thoroughly investigating site conditions, engaging with communities early, or leveraging technology like BIM, prevention is always more effective than scrambling for solutions once problems arise.

    Moving Forward: Turning Civil Engineering Challenges into Opportunities

    The civil engineering challenges we’ve discussed – from technical issues to regulatory hurdles, environmental concerns to project management complexities – aren’t merely obstacles to overcome. They’re opportunities to innovate and develop more resilient, sustainable infrastructure.

    Making the jump from college learning to real-world engineering can feel overwhelming. That’s why I created the Colleges to Career platform in the first place – to help bridge that gap. Just like that first resume template page evolved into a comprehensive career resource, your engineering toolkit will grow with each challenge you tackle.

    As you build your civil engineering career, keep learning and stay flexible. These two skills have helped me succeed more than any technical knowledge I gained in school. Check out our Resume Builder Tool to highlight these critical soft skills for employers.

    I encourage you to share your own experiences with civil engineering challenges in the comments. What problems have you faced, and what creative solutions have you developed? Your insights could help fellow engineers avoid similar pitfalls.

    Ready to enhance your civil engineering knowledge? Check out our video lectures on structural analysis, site management, and sustainable design principles. And don’t forget to download our free “Top 5 Civil Engineering Project Risk Mitigation Strategies” checklist to help you proactively address challenges on your next project.

    Remember: great civil engineers don’t just solve problems – they anticipate them. With the right mindset and tools, you can transform challenges into stepping stones for career growth and project success.

  • Construction Materials: A Practical Guide to Choosing Right

    Construction Materials: A Practical Guide to Choosing Right

    I still remember my first day at a construction site after graduating from Jadavpur University – standing there completely overwhelmed as the supplier rattled off material options I’d only read about in textbooks. That day taught me something they don’t fully explain in engineering school – theoretical knowledge and practical application are two very different beasts.

    Construction materials are the foundation of every successful building project. Choosing the right materials determines not just how your structure looks, but how it performs, how long it lasts, and how much it ultimately costs. Whether you’re just graduating and entering the construction field or taking on your first major project, understanding how to select the right construction materials is a skill that will serve you throughout your career.

    In this guide, I’ll walk you through the practical considerations for selecting construction materials based on my experience working across various product and client-based projects. I’ve made plenty of mistakes along the way so you don’t have to!

    Check out our other career resources for new graduates

    Understanding Your Project Requirements Before Material Selection

    Before diving into specific materials, you need to get crystal clear on what your project actually needs. This might seem obvious, but I’ve seen many young engineers skip this step and rush straight to material selection based on what’s trending or what they’re familiar with.

    Defining Your Project’s Purpose and Lifespan

    Every structure has different requirements. A temporary storage facility needs different materials than a 50-year residential building. Ask yourself:

    • How long should this structure last?
    • What is its primary purpose?
    • Will the building’s use change over time?

    I once worked on a project where we used standard materials for what we thought was a temporary structure. Two years later, the client decided to make it permanent, and we had to replace almost everything at considerable expense. Don’t make the same mistake!

    Accounting for Location and Climate

    Your building site’s climate dramatically impacts material selection:

    • Hot, humid environments require materials resistant to moisture and mold
    • Cold regions need materials with good insulation properties
    • Coastal areas demand corrosion-resistant materials
    • Earthquake-prone regions require flexible, ductile materials

    When I consulted on a project in coastal Mumbai, we initially selected standard steel components. After just one monsoon season, we discovered significant corrosion issues. We had to replace these with galvanized alternatives – a costly lesson in regional adaptation.

    Load-Bearing Requirements

    Different materials handle structural loads differently:

    • Concrete: Excellent for handling weight pushing down, not so great for pulling forces
    • Steel: Great for both pushing and pulling forces
    • Wood: Good strength for its weight, but can’t span as far as other materials

    For a warehouse project I worked on, we initially underestimated the floor loads. The concrete we specified was adequate for normal commercial use but couldn’t handle the heavy machinery that would eventually occupy the space. The flooring had to be reinforced later – another expensive fix that proper planning could have prevented.

    Key Takeaway: Always begin material selection by clearly defining your project’s purpose, location demands, and structural requirements. The most expensive material isn’t always the best choice – the right material is the one that precisely meets your specific needs.

    Types of Construction Materials and Their Applications

    Construction materials form the backbone of any project, each with specific strengths and limitations. Let’s break down the major categories and where they work best.

    Concrete: The Versatile Foundation

    Concrete remains one of the most widely used construction materials globally, and for good reason. I’ve used different concrete mixes across various projects, each serving different purposes:

    • Standard concrete: Great for foundations and structural support
    • Reinforced concrete: Adds tensile strength through steel reinforcement
    • Lightweight concrete: Useful for non-load bearing walls and insulation
    • High-performance concrete: Designed for specialized applications like high-rise structures

    The mix ratio dramatically affects performance. For a small commercial project, we adjusted the traditional 1:2:4 (cement:sand:aggregate) ratio to a leaner 1:3:6 mix for the foundation, saving costs without compromising structural integrity.

    Steel: Strength and Flexibility Combined

    Steel construction offers several advantages:

    • Exceptional strength-to-weight ratio
    • Flexible design possibilities
    • Faster construction timelines
    • Great for high-rise structures

    During my work on a multi-story office building, we opted for a steel frame construction that reduced the project timeline by nearly 30% compared to traditional concrete construction. However, we had to factor in additional fireproofing costs, which newcomers to construction often overlook.

    Wood and Engineered Wood Products

    Wood offers natural beauty and sustainability:

    • Traditional lumber: Great for residential framing
    • Engineered wood (plywood, OSB, LVL): More consistent performance
    • Cross-laminated timber (CLT): Increasingly popular for eco-friendly mid-rise buildings

    I’ve seen engineered wood products gain tremendous popularity over the years. Their consistent performance and reduced waste make them excellent choices, particularly for residential construction.

    Masonry Materials

    Brick, stone, and concrete blocks offer:

    • Excellent thermal mass
    • Good sound insulation
    • Fire resistance
    • Aesthetic appeal

    For a heritage-inspired office building, we used brick masonry for the facade. While more labor-intensive than other options, the visual appeal and thermal benefits justified the choice. Just remember that masonry requires skilled labor – a factor that’s becoming increasingly important to consider as experienced masons become scarcer in India.

    Material Strengths Limitations
    Concrete Durability, compressive strength, fire resistance Poor tensile strength, heavy, high carbon footprint
    Steel High strength-to-weight ratio, ductility, speed of construction Corrosion vulnerability, thermal conductivity, fireproofing needed
    Wood Renewable, good insulation, aesthetic appeal Susceptible to moisture, limited span capabilities, fire concerns
    Masonry Thermal mass, durability, low maintenance Labor intensive, heavy, limited flexibility

    Quick Tips:

    • Use concrete where compression strength and durability matter most
    • Choose steel when construction speed or longer spans are priorities
    • Consider wood for sustainable projects with good insulation needs
    • Select masonry when thermal performance and aesthetics are key factors

    The Bottom Line: Balancing Cost and Value in Material Selection

    My first independent project after graduation taught me a painful lesson about budgeting. I chose premium materials across the board, only to realize halfway through that we were going to blow past our budget by 40%. What followed was a frantic redesign and some uncomfortable client conversations. Let me help you avoid that stress.

    Initial Material Costs vs. Lifetime Expenses

    When evaluating construction materials, consider:

    • Purchase price
    • Installation costs
    • Maintenance requirements
    • Expected lifespan
    • Replacement costs
    • Energy efficiency impact

    A common mistake I see young engineers make is focusing solely on the upfront costs. On a residential project I consulted on, the client initially wanted to use the cheapest available windows to stay within budget. We calculated that upgrading to double-glazed units would add about ₹80,000 to the initial cost but save approximately ₹15,000 annually in energy bills. The premium version paid for itself in just over 5 years.

    Real-World Cost Comparisons

    Let’s compare some common flooring options for a 2,000 square foot commercial space:

    Flooring Material Initial Cost (₹/sq.ft.) Lifespan (years) Annual Maintenance (₹/sq.ft.)
    Vinyl Tile 80-150 7-10 15
    Ceramic Tile 150-300 15-20 10
    Polished Concrete 100-250 20+ 5
    Hardwood 350-600 25+ 20

    When you calculate the 10-year cost of ownership (including initial installation, maintenance, and potential replacement), polished concrete often emerges as the most economical option despite its moderate upfront cost.

    Strategic Material Cost-Cutting Without Sacrificing Quality

    Here are practical strategies I’ve used to reduce costs without compromising quality:

    1. Prioritize spending on structural elements and areas with high visibility
    2. Consider regional materials to reduce transportation costs
    3. Use prefabricated components where possible to reduce labor costs
    4. Look for material alternatives that provide similar performance at lower costs
    5. Time purchases strategically to take advantage of market fluctuations

    On a recent office renovation project, we saved nearly 15% on our flooring budget by using high-quality luxury vinyl tile in back-office areas while reserving premium hardwood for client-facing spaces. The visual difference was negligible, but the cost savings were substantial.

    Key Takeaway: The cheapest material is rarely the most cost-effective in the long run. Calculate the total cost of ownership over the expected lifespan of your structure to make truly economical choices. Strategic material selection in different areas can yield significant savings without compromising overall quality.

    Building a Greener Future: Sustainable Construction Materials

    During my engineering studies at Jadavpur University, sustainability wasn’t emphasized nearly as much as it is today. It’s been fascinating to watch the industry evolve toward more environmentally conscious practices. Today, sustainable construction isn’t just good ethics—it’s good business.

    Understanding Material Sustainability Metrics

    When evaluating materials for sustainability, consider:

    • Carbon footprint (how much CO2 is released when making the material)
    • Recyclability
    • Renewable source materials
    • Local availability (reduces transportation emissions)
    • VOC emissions and indoor air quality impact
    • Water consumption in manufacturing

    I’ve found that many clients are surprised to learn that common materials like concrete have a massive carbon footprint. Traditional concrete production accounts for about 8% of global CO2 emissions according to the World Green Building Council, 2023.

    Innovative Sustainable Materials Worth Considering

    Some of the most promising sustainable materials I’ve worked with include:

    1. Cross-Laminated Timber (CLT) – Engineered wood product that’s replacing concrete in some mid-rise buildings, with a much lower carbon footprint
    2. Hempcrete – A biocomposite made from hemp hurds and lime, providing excellent insulation with carbon-negative potential
    3. Recycled Steel – Requires 75% less energy to produce than virgin steel while maintaining structural properties
    4. Low-Carbon Concrete – Incorporates industrial byproducts like fly ash to reduce cement content and carbon emissions
    5. Bamboo – Fast-growing, renewable alternative to traditional timber with excellent tensile strength

    When we incorporated recycled steel and low-carbon concrete on a commercial project last year, we reduced the building’s carbon footprint by nearly 30% with a cost increase of just 3.5%.

    Lifecycle Assessment: The Complete Picture

    Many construction professionals focus solely on operational efficiency (how much energy a building uses), but embodied energy (the energy required to produce, transport, and install materials) is equally important.

    A true lifecycle assessment (LCA) considers:

    • Raw material extraction
    • Manufacturing process
    • Transportation
    • Installation
    • Use phase
    • End-of-life disposal or recycling

    For example, aluminum has a high energy cost in production but is indefinitely recyclable with minimal quality loss. For a building meant to last 50+ years, aluminum might be greener in the long run than materials that take less energy to make initially but can’t be recycled easily when the building is eventually torn down.

    Key Takeaway: Don’t just look at a material’s immediate environmental impact. Consider the entire lifecycle from production through disposal or recycling. The most sustainable choice balances minimal environmental impact with performance requirements and project longevity.

    Emerging Green Material Trends for 2023-2024

    The sustainable materials landscape is evolving rapidly in India. Some exciting trends I’m seeing include:

    • Bio-based insulation – Materials like mycelium (mushroom-based) insulation that offer excellent thermal performance with minimal environmental impact
    • Self-healing concrete – Concrete with bacterial additives that automatically repair cracks, extending lifespan
    • Mass timber construction – Growing adoption of engineered wood products for larger buildings, particularly in Bangalore and Mumbai
    • Agri-waste composites – Innovative materials using agricultural waste like rice husks and sugarcane bagasse

    Several of my clients are now specifically requesting these materials as part of their corporate sustainability initiatives.

    Technical Considerations and Building Codes: Ensuring Safety and Compliance

    If there’s one thing I learned quickly after graduating from engineering school, it’s that theoretical knowledge meets a whole new reality when you have to navigate building codes and regulations. Remember, building codes aren’t just helpful suggestions – they’re legal requirements. Ignore them, and you’ll face expensive penalties, project delays, or even legal action.

    The Non-Negotiable Nature of Building Codes

    Building codes exist for public safety, and they dictate minimum standards for:

    • Structural integrity
    • Fire safety
    • Accessibility
    • Energy efficiency
    • Plumbing and electrical systems
    • Seismic resistance (in applicable zones)

    Early in my career, I worked on a project where we had to halt construction because our material selections, while technically sound from an engineering perspective, didn’t meet local fire code requirements. The redesign and material substitutions cost the client both time and money.

    Different regions have different codes, and they’re frequently updated. In India, we primarily follow the National Building Code (NBC), Bureau of Indian Standards (BIS) specifications, and local municipal regulations. Always verify you’re referencing the most current version.

    Critical Performance Specifications

    When selecting materials, pay close attention to these technical specifications:

    1. Fire Rating – Measured in hours a material can withstand fire before failing
    2. Sound Transmission Class (STC) – Measures how well a material blocks sound
    3. R-Value – Indicates thermal resistance of insulating materials
    4. Compressive and Tensile Strength – Critical for structural materials
    5. Water Absorption Rate – Particularly important in wet areas and external applications

    For a hospital project I consulted on, we had to select wall materials with a minimum 2-hour fire rating for certain areas, while also meeting specific STC ratings to ensure patient privacy. These requirements narrowed our options considerably and influenced the entire design approach.

    Material Certification and Standards

    Always look for materials that meet recognized standards:

    • BIS certification (Bureau of Indian Standards)
    • ISO certifications
    • CE marking (for European standards)
    • ASTM compliance (American Society for Testing and Materials)

    These certifications ensure materials meet minimum quality and performance standards. I’ve seen projects where contractors substituted non-certified materials to cut costs, only to face rejection during inspections and expensive rework.

    Common Code Compliance Issues

    Based on my experience, these are the most frequent areas where material selection conflicts with code requirements:

    • Inadequate fire-resistance ratings
    • Non-compliant thermal insulation values
    • Structural materials that don’t meet load requirements
    • Accessibility-related material specifications (slip resistance, etc.)
    • Materials that don’t meet local energy efficiency standards

    For a commercial kitchen renovation, we initially specified a flooring material that met our aesthetic and durability requirements but failed to provide the slip resistance required by code. Identifying this issue during the planning phase saved us from a costly replacement after installation.

    Quick Tips for Code Compliance:

    • Always check the latest version of applicable building codes
    • Consult with local authorities early in the planning process
    • Keep material data sheets and test certificates for all major components
    • When in doubt, err on the side of higher performance standards
    • Budget for code compliance from the beginning – it’s not an optional expense

    Check out our comprehensive interview preparation resources

    Real-World Applications: Construction Material Case Studies

    Let’s look at some real-world examples that illustrate effective material selection in different contexts. These cases represent projects I’ve either worked on directly or studied closely, and they offer valuable insights into practical decision-making.

    Case Study 1: Multi-Story Residential Building in Urban Setting

    Project Context: A six-story residential building in Bangalore with 24 apartments, facing south

    Key Material Decisions:

    • Foundation/Structure: Cast-in-place reinforced concrete was selected for its compressive strength and ability to handle the building’s vertical loads. This added approximately 15% to the structural cost compared to a concrete block system but provided superior durability and reduced maintenance costs.
    • External Walls: Autoclaved Aerated Concrete (AAC) blocks were chosen instead of traditional clay bricks. While AAC blocks cost about 20% more upfront, they provided:
      • Better thermal insulation (reducing cooling costs by ~30%)
      • Lighter weight (reducing structural requirements)
      • Faster construction time (cutting labor costs by 25%)
    • Roofing: A combination of reinforced concrete with weatherproof membrane and reflective coating reduced heat gain by 40% compared to conventional treatments.

    Outcome: The material choices increased the initial construction budget by 8% but reduced operational costs by approximately 20% annually while significantly improving occupant comfort.

    Case Study 2: Budget-Conscious Commercial Warehouse

    Project Context: A 50,000 sq. ft. warehouse in an industrial zone with strict budget limitations

    Key Material Decisions:

    • Structure: Pre-engineered steel building system instead of traditional construction, providing:
      • 30% faster construction time
      • 15% lower initial cost
      • Greater clear spans for internal space flexibility
    • Flooring: Instead of high-end polished concrete throughout, we used:
      • Standard concrete with hardeners in high-traffic areas
      • Epoxy coating only in specific zones requiring chemical resistance
      • This targeted approach saved 35% on flooring costs
    • Insulation: Strategic use of reflective insulation in the roof combined with minimal wall insulation, optimizing the cost-benefit ratio for temperature control.

    Outcome: The project came in 7% under budget while meeting all functional requirements. The client reported 25% lower energy costs than their previous facility.

    Case Study 3: Environmentally Focused Educational Building

    Project Context: A new campus building for environmental studies with strict sustainability goals

    Key Material Decisions:

    • Structure: Hybrid system using:
      • Cross-laminated timber for upper floors (reducing carbon footprint by 40% compared to concrete)
      • Concrete only for foundation and ground floor
      • Exposed structural elements to eliminate additional finishing materials
    • Envelope: High-performance glazing with automated shading systems, costing 60% more than standard windows but reducing HVAC loads by 45%.
    • Interior Finishes: Prioritized:
      • Low-VOC materials throughout
      • Bamboo flooring from sustainable sources
      • Recycled content in all possible applications

    Outcome: The building achieved a 5-star GRIHA rating (Green Rating for Integrated Habitat Assessment) and became a teaching tool itself, with 65% lower operational energy use than comparable buildings on campus.

    Key Takeaway: Successful material selection requires balancing competing priorities – cost, performance, sustainability, and code compliance. Different project types demand different trade-offs, but strategic choices can often achieve multiple objectives simultaneously. Think beyond individual materials to consider how they work together as a system.

    Frequently Asked Questions About Construction Materials

    What are the best materials for construction in hot, humid climates like coastal India?

    For hot, humid environments like coastal India, I recommend:

    • External walls: Autoclaved Aerated Concrete (AAC) blocks, which provide excellent thermal insulation while resisting moisture
    • Roofing: Reflective metal roofing with proper insulation underneath to minimize heat gain
    • Windows: Double-glazed units with low-E coating to reduce heat transfer
    • External finishes: Breathable, water-resistant paints and coatings to prevent moisture accumulation
    • Structural elements: Properly treated and/or naturally resistant timber, or corrosion-resistant steel

    The coastal environment adds salt air, which is extremely corrosive. Avoid standard steel components where possible, or ensure they’re properly galvanized or otherwise protected.

    How do you choose the right material for a limited budget project?

    When working with tight budgets:

    1. Prioritize structural integrity first – Never compromise on foundation and structural elements
    2. Identify high-impact visual areas – Spend more on materials in spaces where aesthetics matter most
    3. Consider phased material upgrades – Install infrastructure for future upgrades (like conduit for wiring even if you can’t afford all fixtures now)
    4. Look at alternative materials – For example, engineered wood often provides similar aesthetics to solid wood at lower costs
    5. Focus on operational savings – Investing in better insulation might cost more upfront but save significantly on energy costs

    On a recent budget-conscious project, we used standard concrete flooring but added a decorative polished finish only in client-facing areas, saving almost 40% on flooring costs while maintaining a professional appearance.

    What are the most sustainable construction material options available in India?

    Several sustainable materials are readily available in India:

    • Bamboo – Fast-growing, renewable, and versatile for both structural and decorative applications
    • Compressed Stabilized Earth Blocks (CSEB) – Low embodied energy, good thermal properties, and can use local soil
    • Recycled/Reclaimed Wood – Reduces deforestation and often has unique character
    • Fly Ash Bricks – Uses industrial waste product, reducing landfill while performing similarly to clay bricks
    • Ferrocement – Thin sections of mortar reinforced with light mesh, using less material than traditional concrete

    A growing number of Indian projects are incorporating these materials successfully. The Indian Green Building Council (IGBC) certification system provides good guidelines for sustainable material selection specifically for the Indian context.

    How do building codes affect material selection in different regions of India?

    Building codes vary significantly across India, with metro cities typically having more stringent requirements than rural areas. Key regional considerations include:

    • Seismic zones – Different regions have different earthquake risk levels, affecting structural material requirements
    • Coastal regulations – Areas near coastlines have special provisions for corrosion resistance
    • Urban density rules – Many cities have specific fire rating requirements based on building proximity
    • Climate zone adaptations – Some states have incorporated climate-specific energy efficiency requirements

    Always check with the local municipal authority for specific requirements. I once worked on a project in Mumbai where we had to completely revise our material selections to meet coastal regulation zone requirements, delaying the project by two months.

    What’s the best way to evaluate the quality of construction materials before purchase?

    To ensure material quality:

    1. Check certifications – Look for BIS marks, ISO certifications, or other relevant standards
    2. Request test reports – Reputable suppliers can provide testing data for their materials
    3. Sample testing – For critical materials, consider independent laboratory testing
    4. Supplier reputation – Research supplier history and ask for references
    5. Physical inspection – Examine materials personally when possible, checking for consistency and defects

    For a critical infrastructure project, we discovered through independent testing that a batch of cement didn’t meet strength requirements despite having proper certification marks. That experience taught me to never skip verification for critical structural materials.

    Conclusion: Making Informed Construction Material Decisions

    Selecting the right construction materials is both an art and a science. It requires balancing technical requirements, budget constraints, aesthetic goals, and sustainability considerations – all while navigating building codes and practical constraints.

    The best projects I’ve worked on didn’t treat material choices as separate decisions. Instead, they used a strategic approach where each material choice connected to the overall project goals. This makes a huge difference in how the building performs over time.

    Remember these core principles:

    • Start with clear project requirements and priorities
    • Consider lifetime costs, not just initial purchase price
    • Balance performance needs with sustainability goals
    • Ensure compliance with all applicable codes and standards
    • Learn from real-world examples and case studies

    As you move from college into your construction career, you’ll develop your own expertise and perspective on material selection. The theoretical knowledge from engineering school provides a foundation, but practical experience will be your best teacher.

    I started Colleges to Career because I saw firsthand how challenging the transition from academic learning to professional practice can be. Material selection is just one of many areas where textbook knowledge needs to be supplemented with practical insights.

    I hope this guide helps bridge that gap for you. Remember that every project is an opportunity to learn and refine your approach.

    Ready to continue building your construction career knowledge? Our platform offers resources to help you at every stage of your professional journey. From preparing for job interviews to creating a standout resume that highlights your engineering skills, we’ve got you covered.

    Create your professional resume with our specialized tools for engineers

  • Geotechnical Engineering: Your Complete Beginner’s Guide

    Geotechnical Engineering: Your Complete Beginner’s Guide

    Have you ever wondered what keeps skyscrapers from sinking into the ground? Or why some homes develop cracks in their foundations while others don’t? The answer lies in a field that often goes unnoticed until something goes wrong: geotechnical engineering.

    I still remember my first visit to a construction site during my engineering studies at Jadavpur University. The mid-morning sun beat down as I watched engineers meticulously collect soil samples and perform tests that would ultimately determine how the building’s foundation would be designed. That’s when it clicked for me – this hidden aspect of construction isn’t just important, it’s absolutely critical.

    Geotechnical engineering, my specialty during my time at Jadavpur University, is the branch of civil engineering that studies how earth materials behave under and around structures. It’s the hidden hero of construction that keeps buildings standing and safe throughout their lifespan. Without it, our buildings, bridges, and roads would be at risk of settlement, sliding, or even collapse.

    This guide will walk you through the basics of geotechnical engineering, explain soil testing, and show you how this field impacts nearly every aspect of our built environment. Whether you’re a student considering this career path or simply curious about what’s happening beneath your feet, this guide is for you.

    What is Geotechnical Engineering?

    Geotechnical engineering might not be as visible as other engineering disciplines, but it forms the literal foundation of our built world. It’s the science of understanding how earth materials behave when they interact with structures.

    At its core, geotechnical engineering combines principles from soil mechanics, rock mechanics, geology, and structural engineering to solve practical problems. These problems typically involve:

    • Analyzing ground conditions before construction begins
    • Designing foundations that can support structural loads
    • Ensuring slopes remain stable
    • Managing groundwater issues
    • Evaluating the risk of natural hazards like earthquakes and landslides

    When I was working on product designs in the construction industry back in 2018, I quickly learned a hard truth: even the most beautiful architectural designs are worthless if the ground beneath can’t support them. I watched a stunning glass-facade building design get completely reworked because the initial geotechnical report revealed unstable soil conditions. That’s why geotechnical engineers are typically among the first professionals called to a construction site.

    Key Takeaway: Geotechnical engineering focuses on how earth materials interact with structures, forming the foundation of all construction projects. Without proper geotechnical analysis, even the best-designed structures can fail due to ground issues.

    Soil Mechanics: The Foundation of Geotechnical Engineering

    Understanding Different Soil Types

    Soil isn’t just dirt. To a geotechnical engineer like me, soil is a complex material with properties that vary widely depending on its composition. The main soil types include:

    • Sand: Large particles with good drainage but less cohesion
    • Silt: Medium-sized particles that retain water but have poor stability when wet
    • Clay: Tiny particles that can be very stable when dry but problematic when wet
    • Gravel: Very large particles offering excellent drainage and stability

    Think of sand like a jar of marbles – the particles don’t stick together well, and water flows between them easily. Clay, on the other hand, is more like a stack of playing cards – the flat particles can slide against each other when wet, causing instability. I use these analogies when explaining soil behavior to clients who don’t have engineering backgrounds, and they immediately get it.

    Key Properties That Matter in Construction

    Two critical properties that we geotechnical engineers measure are:

    1. Shear Strength: This is soil’s ability to resist forces that would cause it to slide or fail. Imagine trying to build a sandcastle – the sand needs enough strength to hold its shape against gravity and other forces.
    2. Compressibility: This refers to how much a soil will compact under pressure. Some soils, like clay, compress significantly over time, which can cause buildings to settle unevenly.

    During my third year as a consultant, I worked on a high-stakes commercial project where a building was showing signs of differential settlement (one side sinking more than another). After extensive investigation, we discovered that part of the structure was built over an old filled-in pond with highly compressible soil – a mistake that ultimately cost the client over $400,000 in remediation. The geotechnical investigation should have identified this issue before construction began. This experience fundamentally changed how I approach site investigations.

    Key Takeaway: Different soil types (sand, silt, clay, and gravel) behave uniquely under pressure. Understanding soil strength and compressibility is essential for predicting how it will interact with structures, preventing costly failures and safety hazards.

    Geotechnical Engineering in Action: Building a Safer World

    Infrastructure Projects

    Geotechnical engineering plays a critical role in virtually every major construction project:

    Buildings: Before construction begins on a new building, geotechnical engineers determine the soil’s bearing capacity – how much weight it can support without excessive settlement. We then recommend the appropriate foundation type, whether it’s a simple spread footing, a mat foundation, or deep pile foundations that extend to bedrock.

    Bridges: Bridge foundations often present unique challenges since they frequently cross bodies of water or difficult terrain. In 2019, I visited a bridge construction site across the Hooghly River where engineers had to design foundations that could withstand river scouring while being anchored in soft riverbed soils. The solution involved a complex combination of caissons and micropiles that I still reference in my work today.

    Roads: Highway engineers rely on geotechnical input for everything from slope stability to pavement design. The soil beneath a road must be properly compacted and drained to prevent potholes and other failures. I’ve seen highways deteriorate within months because someone cut corners on the geotechnical work.

    Risk Mitigation

    Some of the most important work in geotechnical engineering involves protecting people and property from natural hazards:

    Landslides: Geotechnical engineers analyze slope stability and design mitigation measures like retaining walls, soil nailing, and drainage systems to prevent landslides.

    Earthquakes: During earthquakes, some soils can experience liquefaction – a process where soil temporarily behaves like a liquid. Geotechnical engineers identify areas prone to liquefaction and recommend ground improvement techniques or specialized foundations to mitigate this risk.

    A dramatic example occurred during the 1989 Loma Prieta earthquake in San Francisco, where buildings constructed on artificial fill suffered much more damage than those built on solid ground. This event revolutionized how we approach building on potentially liquefiable soils. I studied this case extensively during my postgraduate work and still apply those lessons in my designs today.

    Key Takeaway: Geotechnical engineering directly impacts the safety and longevity of infrastructure through foundation design and hazard mitigation. From skyscrapers to highways, proper geotechnical work prevents failures that could cost lives and millions in damage.

    Unearthing the Secrets: Geotechnical Investigations Explained

    How Soil Testing Works

    So how do geotechnical engineers actually figure out what’s underground? Through a systematic investigation process that I’ve conducted hundreds of times:

    Site Reconnaissance: Engineers first walk the site, noting visible features like slopes, drainage patterns, and existing structures. I always look for telltale signs like leaning retaining walls or cracks in nearby pavements that might indicate soil issues.

    Soil Sampling: Next, we collect soil samples through methods like:

    • Test pits (excavations that allow direct observation)
    • Drilling boreholes and extracting samples
    • Collecting both disturbed samples (for basic classification) and undisturbed samples (for strength testing)

    Field Testing: Several tests can be performed right on site:

    • Standard Penetration Test (SPT): A weighted hammer is dropped to drive a sampler into the soil, measuring resistance. The number of hammer blows required gives us immediate feedback on soil density.
    • Cone Penetration Test (CPT): A cone-tipped probe is pushed into the soil, measuring resistance continuously. This gives us a detailed profile of soil conditions with depth.

    Laboratory Testing: Samples are taken to a lab for detailed analysis of properties like:

    • Moisture content
    • Grain size distribution
    • Shear strength
    • Consolidation characteristics

    How Soil Testing Affects Construction Projects

    The results of these investigations directly impact every aspect of a construction project:

    1. Foundation Design: Testing reveals whether shallow foundations are sufficient or if deep foundations (piles or drilled shafts) are needed.
    2. Excavation Plans: Understanding soil conditions helps determine if special excavation techniques or temporary supports will be required.
    3. Construction Scheduling: Knowing about potential groundwater issues or difficult soil conditions allows for better scheduling and budgeting.
    4. Risk Management: Identifying problematic soils early helps avoid costly surprises during construction.

    I once supervised a project for a mid-sized office building where initial soil borings missed a pocket of organic material because they were spaced too far apart. During construction, this area began to settle excessively, requiring expensive remediation with micropiles. This expensive lesson taught me the importance of thorough investigation – sometimes a few extra soil borings costing a few thousand dollars can save millions in construction costs.

    Modern geotechnical investigations increasingly use advanced technologies like:

    • Ground-penetrating radar
    • Electrical resistivity imaging
    • Wireless monitoring sensors that provide real-time data
    • Digital twins that model subsurface conditions

    These tools complement traditional methods and help us create more accurate subsurface models. I’ve been particularly impressed with how wireless sensors have transformed monitoring on my recent projects, allowing us to track soil movement with millimeter precision.

    Key Takeaway: Geotechnical investigations combine field and laboratory testing to characterize soil conditions and properties. These findings directly determine foundation designs, construction methods, and project timelines, with inadequate testing often leading to costly construction problems.

    Geotechnical Engineering for a Greener Future

    Climate Adaptation Challenges

    Climate change is creating new challenges for geotechnical engineers that we never had to consider even a decade ago:

    Rising Sea Levels: Coastal areas face increased erosion and flooding, requiring innovative solutions like enhanced seawalls and living shorelines. The projects I worked on in coastal Bengal five years ago are already being reassessed due to accelerating sea level rise.

    Extreme Weather: More intense rainfall events increase landslide risks and can destabilize slopes that were previously considered safe. I’ve had to completely revise my rainfall assumptions for slope stability calculations based on recent climate data.

    Changing Groundwater Patterns: Shifting precipitation patterns alter groundwater levels, affecting soil behavior and foundation performance. In some regions where I work, we’re seeing unprecedented seasonal swings in groundwater levels.

    Last year, I reviewed a coastal protection project where traditional concrete seawalls were being replaced with a combination of engineered berms and native vegetation. This “soft engineering” approach not only protected against erosion but also created habitat and absorbed carbon. The project costs were comparable to traditional methods, but the environmental benefits were substantial.

    Sustainable Innovations

    Our field is responding with innovative approaches to sustainability that I’m excited to implement in my own work:

    Green Materials: Engineers are increasingly using:

    • Recycled concrete aggregate as fill material – I’ve used this successfully on three recent projects
    • Biopolymers as soil stabilizers instead of cement, reducing carbon emissions by up to 90%
    • Geosynthetics made from recycled plastics, giving plastic waste a second life in infrastructure

    Energy Efficiency: Geotechnical aspects of buildings can contribute to energy efficiency through:

    • Earth-sheltered designs that reduce heating/cooling needs
    • Ground source heat pumps that use stable ground temperatures
    • Green roofs that provide insulation and manage stormwater

    I recently read fascinating research from the American Society of Civil Engineers showing that smart, sustainable geotechnical practices can slash a construction project’s carbon footprint by up to 15%. Even better? These practices often cut long-term maintenance costs too – a win-win for builders and the planet.

    In my own practice, I’ve started calculating the carbon footprint of different foundation options alongside traditional cost comparisons. Clients are increasingly interested in this information, especially for projects seeking green building certification.

    Key Takeaway: Climate change is creating new challenges for geotechnical engineers, but also driving innovation in sustainable practices. From recycled materials to earth-sheltered designs, geotechnical solutions can significantly reduce a project’s environmental impact while improving resilience.

    Frequently Asked Questions About Geotechnical Engineering

    What are the career opportunities in geotechnical engineering?

    Geotechnical engineers work in consulting firms, construction companies, government agencies, and research institutions. Some specialize in areas like foundation design, earthquake engineering, or marine geotechnics. Starting salaries typically range from $60,000-80,000, with experienced professionals earning well over $100,000. I’ve found that specialization in areas like earthquake engineering or offshore foundations can command premium compensation.

    Want to prepare for interviews in this field? Check out our specialized interview questions designed to help you land that dream engineering role.

    How much does a geotechnical investigation cost?

    The cost varies widely depending on project size and complexity. For a single-family home, a basic investigation might cost $1,500-3,000. For major commercial projects, costs can run from $10,000 to over $100,000. However, this is typically a small percentage of overall construction costs and provides tremendous value in risk reduction.

    In my experience, even a modest investment in geotechnical investigation typically pays for itself many times over by preventing construction problems. The most expensive geotechnical investigation I’ve ever conducted cost about 0.5% of the total project budget – but it identified issues that could have added 15% to construction costs if discovered during building.

    What software do geotechnical engineers use?

    Common software includes:

    • PLAXIS for finite element analysis of soil behavior – this is my go-to for complex problems
    • Slope/W for slope stability analysis
    • LPile for deep foundation design
    • gINT for managing boring logs and test data

    I’ve watched these tools evolve dramatically over my career, with today’s software offering 3D modeling capabilities that were unimaginable when I started. If you’re entering the field, investing time in learning these programs will significantly boost your career prospects.

    Do I need a geotechnical engineer for my home renovation project?

    It depends on the project. If you’re adding significant structural loads (like a second story), building on a slope, experiencing foundation problems, or in an area with known soil issues, then yes. Even seemingly simple projects like building a retaining wall over 4 feet tall benefit from geotechnical input.

    I’ve seen too many DIY retaining walls fail because the owner didn’t understand soil pressures or drainage requirements. A consultation with a geotechnical engineer might cost $500-1,000, but compared to rebuilding a failed structure, it’s a bargain.

    The Growing World of Geotechnical Engineering

    Geotechnical engineering combines science and practical problem-solving to ensure the ground beneath our structures remains stable and secure. From determining what type of foundation your house needs to designing earthquake-resistant infrastructure, we work at the critical interface between human construction and natural earth materials.

    As we face increasing challenges from climate change and growing urban development, the role of geotechnical engineers becomes even more crucial. Our expertise helps create resilient, sustainable infrastructure that can withstand both natural forces and the test of time.

    Curious about building a career in geotechnical engineering? I’ve compiled everything I wish I’d known when starting out in our comprehensive video lectures. And if you’re already on your career journey, our resume builder tool can help you highlight your technical skills effectively to potential employers.

    Whether you’re just starting your academic journey or looking to transition into this growing field, understanding the fundamentals of geotechnical engineering opens doors to a career that’s quite literally foundational to our built environment. It’s a field that continues to challenge and reward me after all these years, as we solve the complex puzzle of how to build safely on our ever-changing Earth.

    About the Author

    Daniyaal studied engineering at Jadavpur University and has over 15 years of experience in geotechnical engineering across India and internationally. He specializes in foundation design for challenging soil conditions and has worked on projects ranging from residential developments to major infrastructure. In addition to his consulting work, Daniyaal is passionate about educating the next generation of engineers.

  • The Importance of Structural Engineering in Modern Construction

    The Importance of Structural Engineering in Modern Construction

    Structural engineering is a crucial branch of civil engineering that focuses on designing, analyzing, and ensuring the stability and safety of buildings and infrastructure. It plays a fundamental role in shaping the modern world, providing solutions that ensure structures can withstand natural forces, heavy loads, and environmental conditions.

    What is Structural Engineering?

    Structural engineering is a specialized field within civil engineering that involves the design and analysis of structures such as buildings, bridges, towers, and tunnels. The primary goal is to ensure these structures can safely support their loads and withstand external pressures like wind, earthquakes, and other natural forces. Structural engineers use advanced software, including Civil 3D, to model, analyze, and refine their designs for maximum efficiency and durability.

    How Does Structural Engineering Ensure the Safety of Buildings?

    The safety of buildings is the foremost concern in structural engineering. Engineers use a combination of design principles, material science, and modern technology to create safe structures. Below are some key ways structural engineering ensures safety:

    1. Load Analysis and Distribution: Structural engineers calculate how different loads (dead load, live load, and environmental load) impact a structure. This ensures buildings can support their weight and additional external forces.
    2. Material Selection: Engineers choose appropriate materials, such as concrete, steel, and composite materials, to enhance strength and durability. Concrete, for example, is widely used in structural engineering for its high compressive strength and fire resistance.
    3. Seismic and Wind Resistance: By incorporating advanced design strategies, structural engineers ensure buildings can withstand earthquakes and strong winds. Techniques such as base isolation and flexible frameworks help absorb shocks and reduce damage.
    4. Foundation Stability: The foundation is critical in supporting a building’s weight and preventing structural failure. Engineers conduct soil analysis and design foundations that prevent settlement and shifting.
    5. Use of Modern Software and Simulation: Software like Civil 3D allows engineers to create 3D models and run simulations, ensuring the feasibility and safety of structures before construction begins.

    Role in Society

    Structural engineering plays a crucial role in the development and maintenance of the built environment, significantly influencing the quality of life and safety of communities. The discipline is foundational to civil construction, ensuring that structures such as bridges, buildings, and infrastructure projects are designed to withstand various loads and environmental conditions while maintaining safety and functionality.

    Enhancing Safety and Resilience

    One of the primary responsibilities of structural engineers is to implement effective Structural Safety Systems. These systems are essential for safeguarding buildings and infrastructure against potential hazards, ensuring the reliability and safety of structures for their occupants and users. By employing advanced design techniques and materials, structural engineers contribute to creating structures that not only meet regulatory compliance but also promote long-term durability and resilience against disasters.

    Fostering Collaboration and Innovation

    The collaboration between clients, project sponsors, and professional bodies is integral to successful structural engineering projects. Clients provide the vision and budget while project sponsors oversee implementation, with professional bodies establishing industry standards that guide best practices. Furthermore, the integration of emerging technologies, such as Building Information Modeling (BIM) and automation, enhances project efficiency and collaboration among various stakeholders, thereby improving overall outcomes in civil construction.

    Educational Pathways and Workforce Development

    To support the evolving demands of the industry, structural engineering education emphasizes training and qualifications through a variety of pathways, from vocational training to university degrees. This ensures that aspiring professionals are equipped with the necessary skills and knowledge to adapt to technological advancements and industry trends. By promoting a porous boundary between academia and industry, students benefit from real-world experiences that enhance their learning and career prospects.

    Impact on Sustainable Development

    As societies increasingly prioritize sustainability, structural engineering also plays a vital role in the development of green building practices. Engineers are now leveraging renewable materials and innovative design strategies to reduce energy consumption and minimize the environmental impact of structures. This focus on sustainability not only addresses current environmental challenges but also ensures that future generations inherit a safer and healthier built environment.

    Key Principles

    Fundamental Concepts in Structural Engineering

    Structural engineering is governed by several key principles that are essential for ensuring the safety and integrity of structures. Among these, the concepts of loads, strength, and stiffness play a pivotal role. Loads refer to the various forces that a structure is designed to withstand, including dead loads (permanent weight), live loads (temporary loads), and environmental loads (such as snow and wind). The accurate estimation and application of these loads are critical for the successful design and execution of infrastructure projects. Strength pertains to the ability of a material or structure to resist applied loads without failing. Different materials exhibit varying strength properties, making the selection of appropriate materials crucial for maintaining structural integrity. Stiffness, on the other hand, describes a structure’s resistance to deformation under load, which is essential for ensuring that structures remain functional and safe under various conditions.

    Seismic Design Considerations

    In regions prone to earthquakes, seismic design principles are integral to structural engineering. Seismic codes and standards provide guidelines that define design parameters, construction methodologies, and testing protocols to enhance the resilience of structures against seismic forces. Engineers must consider various load combinations—such as dead loads combined with seismic loads—to evaluate and ensure the structural integrity of buildings. These considerations not only protect lives but also mitigate economic disruption and property damage during seismic events.

    Challenges and Innovations

    Structural engineering faces numerous challenges as it evolves to meet modern demands, particularly regarding sustainability and technological advancement. Among these challenges are the rising costs of innovative materials and the need for significant investment in new technologies. Engineers are increasingly tasked with balancing the often conflicting interests of various stakeholders while ensuring that projects remain cost-effective and environmentally friendly.

    Current Trends and Innovations

    The field of structural engineering is witnessing a wave of innovation, driven by the necessity for sustainable and resilient design practices. One significant trend is the development of new construction materials, such as self-healing concrete, which enhances durability while minimizing environmental impact. Additionally, the repurposing of CO2 in construction processes aims to mitigate the carbon footprint associated with the industry.

    Resilience Engineering

    As the impacts of climate change become increasingly apparent, resilience engineering is gaining prominence within structural engineering. This approach focuses on designing structures that can absorb or avoid damage while maintaining functionality during extreme weather events.

    Use of Advanced Technologies

    Technological advancements such as drones for aerial inspections, predictive analytics, and digital tools for safety monitoring are revolutionizing safety processes in construction, ensuring a safer and more resilient built environment.

    Summary

    Structural engineering is a vital discipline within civil engineering that focuses on the design, analysis, and construction of structures capable of withstanding various forces and environmental conditions. It plays a crucial role in ensuring the safety and functionality of infrastructure such as buildings, bridges, and dams, influencing the quality of life for communities worldwide. The field continues to evolve, embracing digital tools, artificial intelligence, and sustainable practices to address modern challenges.